mParticle
What is mParticle?
mParticle is a Customer Data Platform that collects first-party data from clients and allows them to send it to a variety of analytics, marketing and data warehousing platforms. We improve customer experience by removing the technical complexity of installing and maintaining new marketing services.
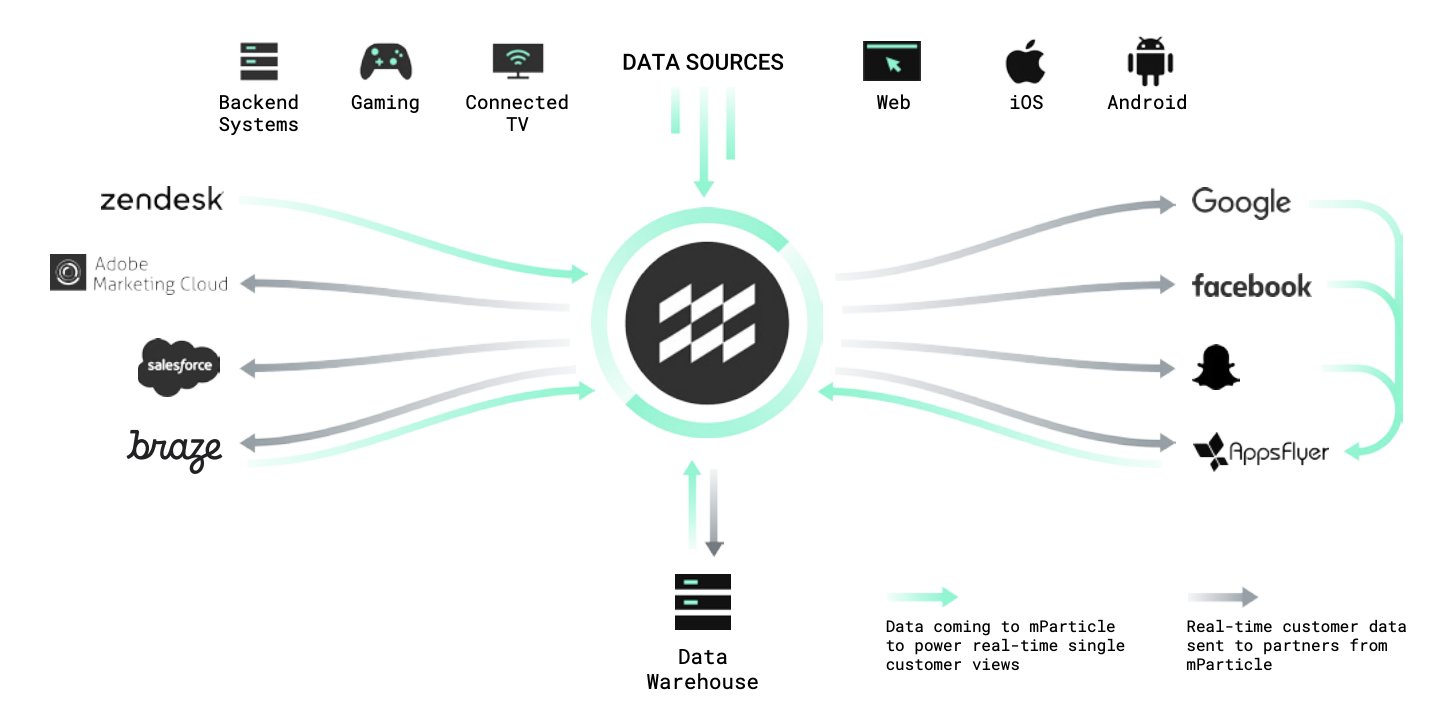
How LiveLike and mParticle will benefit your platform?
When LiveLike is set as the destination, the mParticle will send data to LiveLike, enabling customers to provide rewards and perform automation in response to events that occur within the source application.
Improved User Engagement: LiveLike enables customers to offer rewards to their users in response to specific events within their source application. This can help increase user engagement and retention by providing a more personalized and gamified user experience.
Automation: By integrating mParticle and LiveLike, customers can automate the process of delivering rewards to users based on specific events or triggers within their application. This can save time and resources by eliminating the need for manual intervention.
Enhanced Data Analysis: mParticle provides detailed insights and analytics about user behavior and interactions with the source application. By integrating with LiveLike, customers can gain further insights into how users engage with reward systems and gamification features, allowing for more informed decision-making and optimization of the user experience.
Flexibility: Both LiveLike and mParticle are highly customizable and can be tailored to meet the specific needs of each individual customer. This allows for a more personalized and effective approach to engaging users and delivering rewards.
How to integrate?
- Outbound Integration allows mParticle to forward clients' customer data to the LiveLike platform as Event Data or Audience Data.
- Inbound Integration allows mParticle to receive Event data from our platform.
Inbound Integration
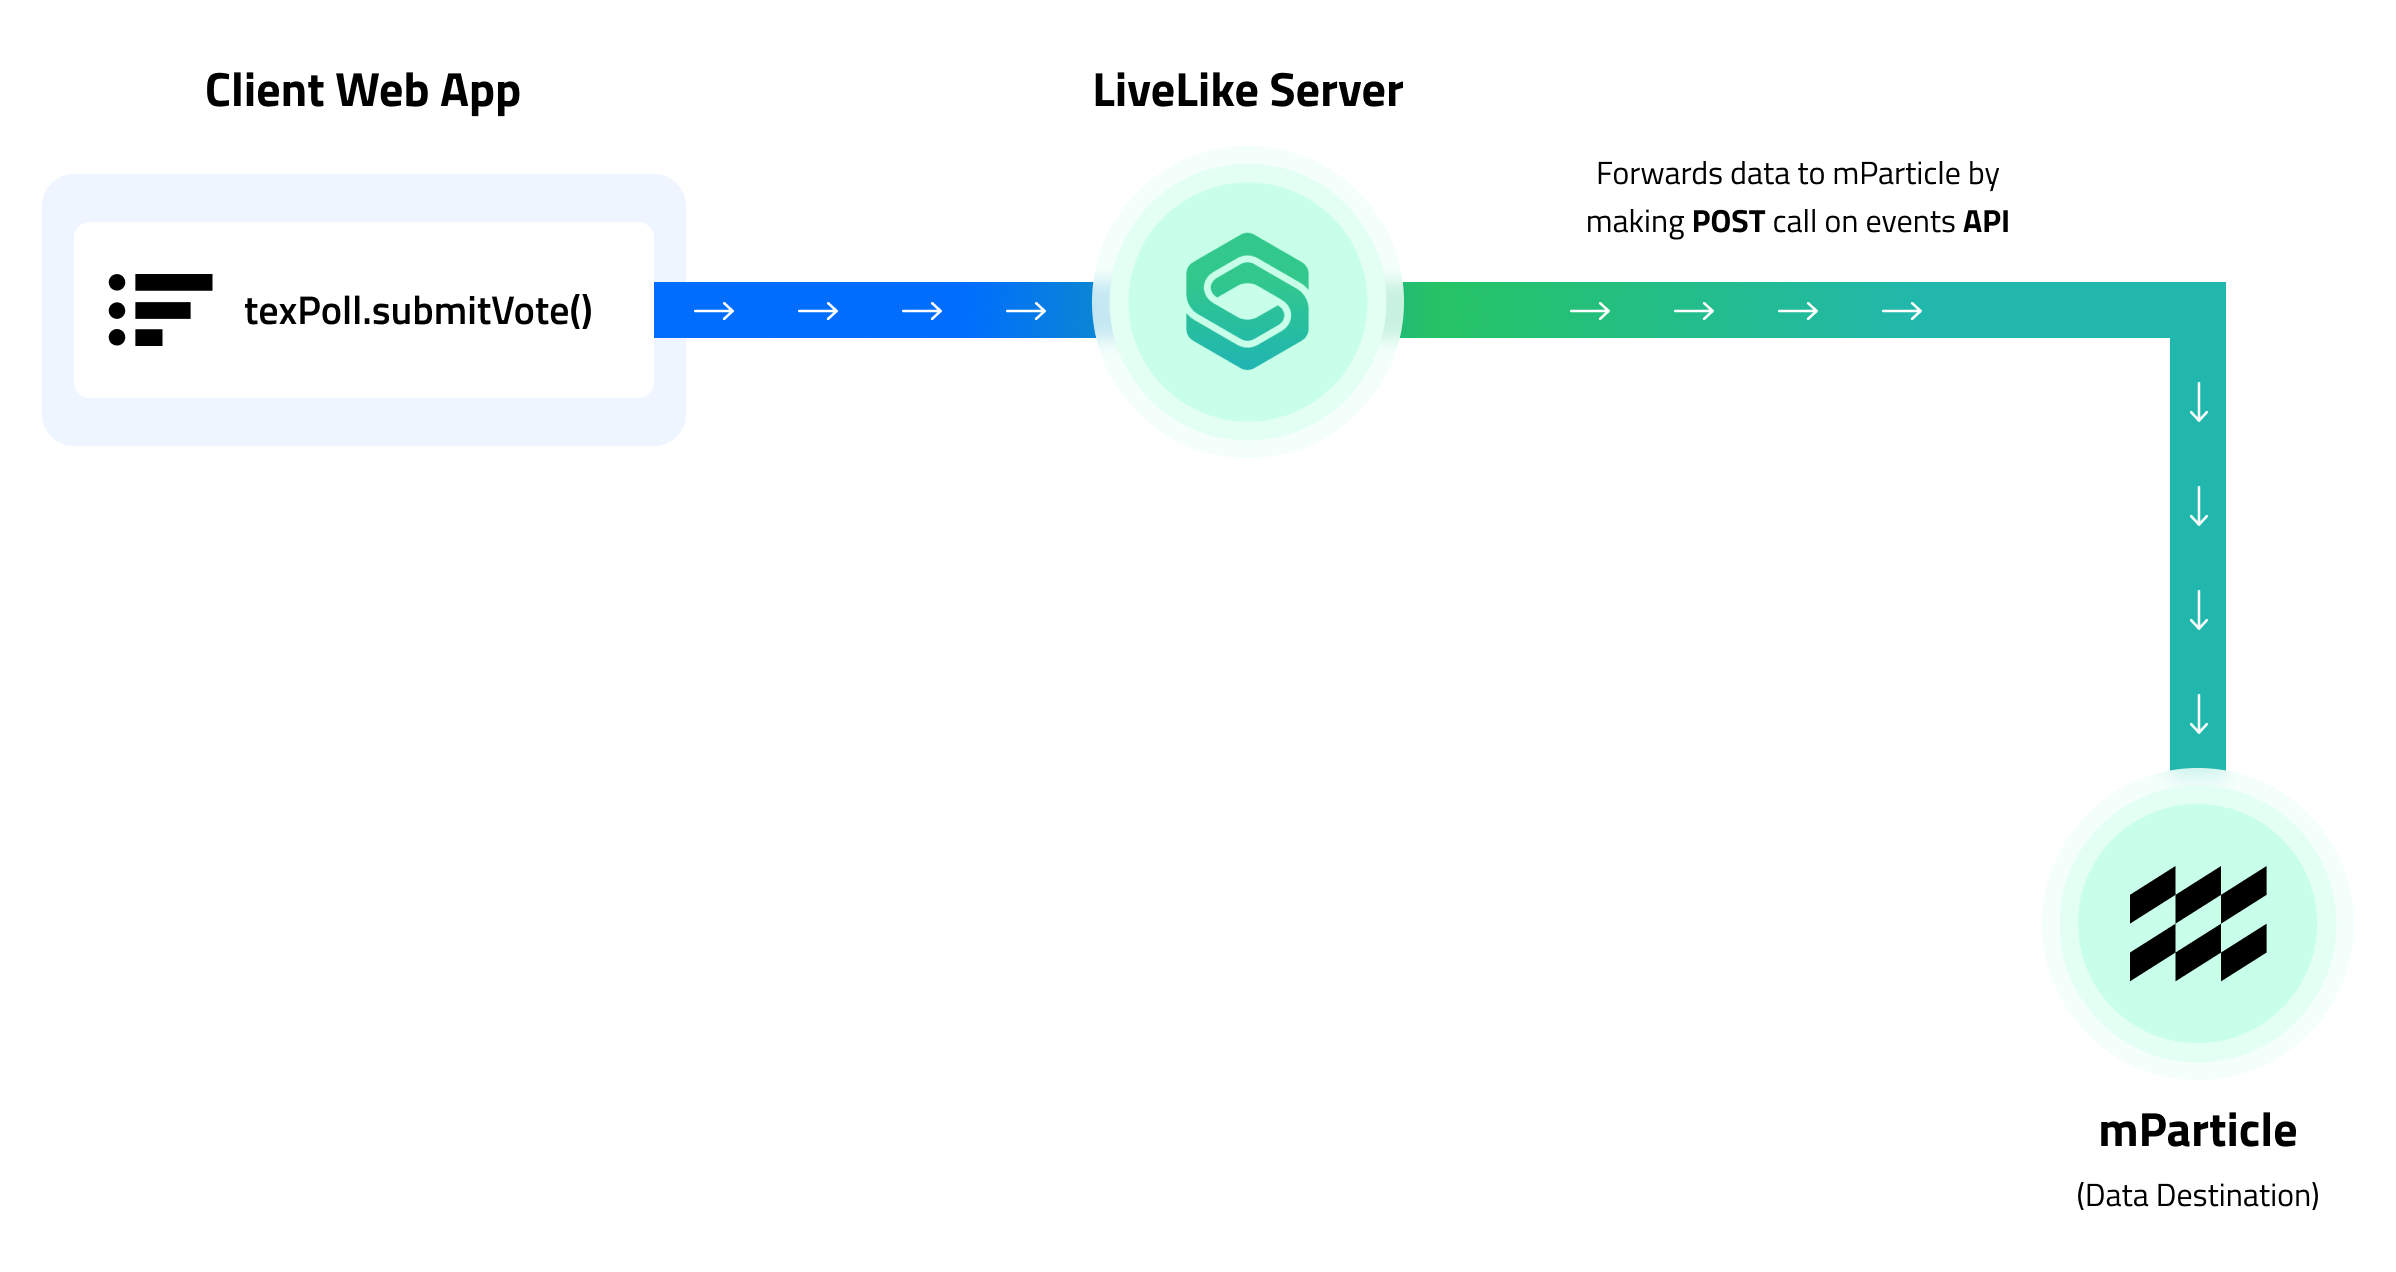
User Events
- Widget interaction
- Widget Impression
- New Application Profile is created
- Reaction on chat message
- New chat message is created (sticker, message)
- Quest is completed
Authentication
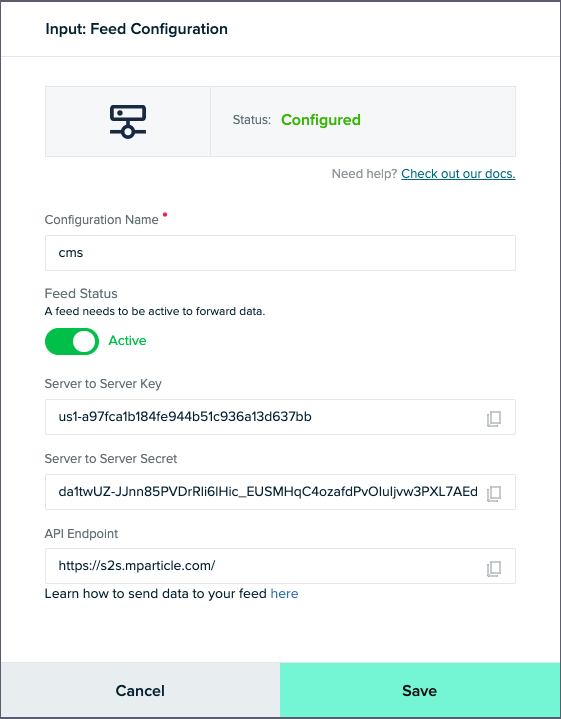
The HTTP APIs are secured via basic authentication. We can use API key for the “username” and API secret for “password”.
Outbound Integration

Based on the data received by LiveLike, and configuration by the client, clients can automate LiveLike features or see their recorded data, build custom reports, and measure user engagement and retention.
Sending data to LiveLike
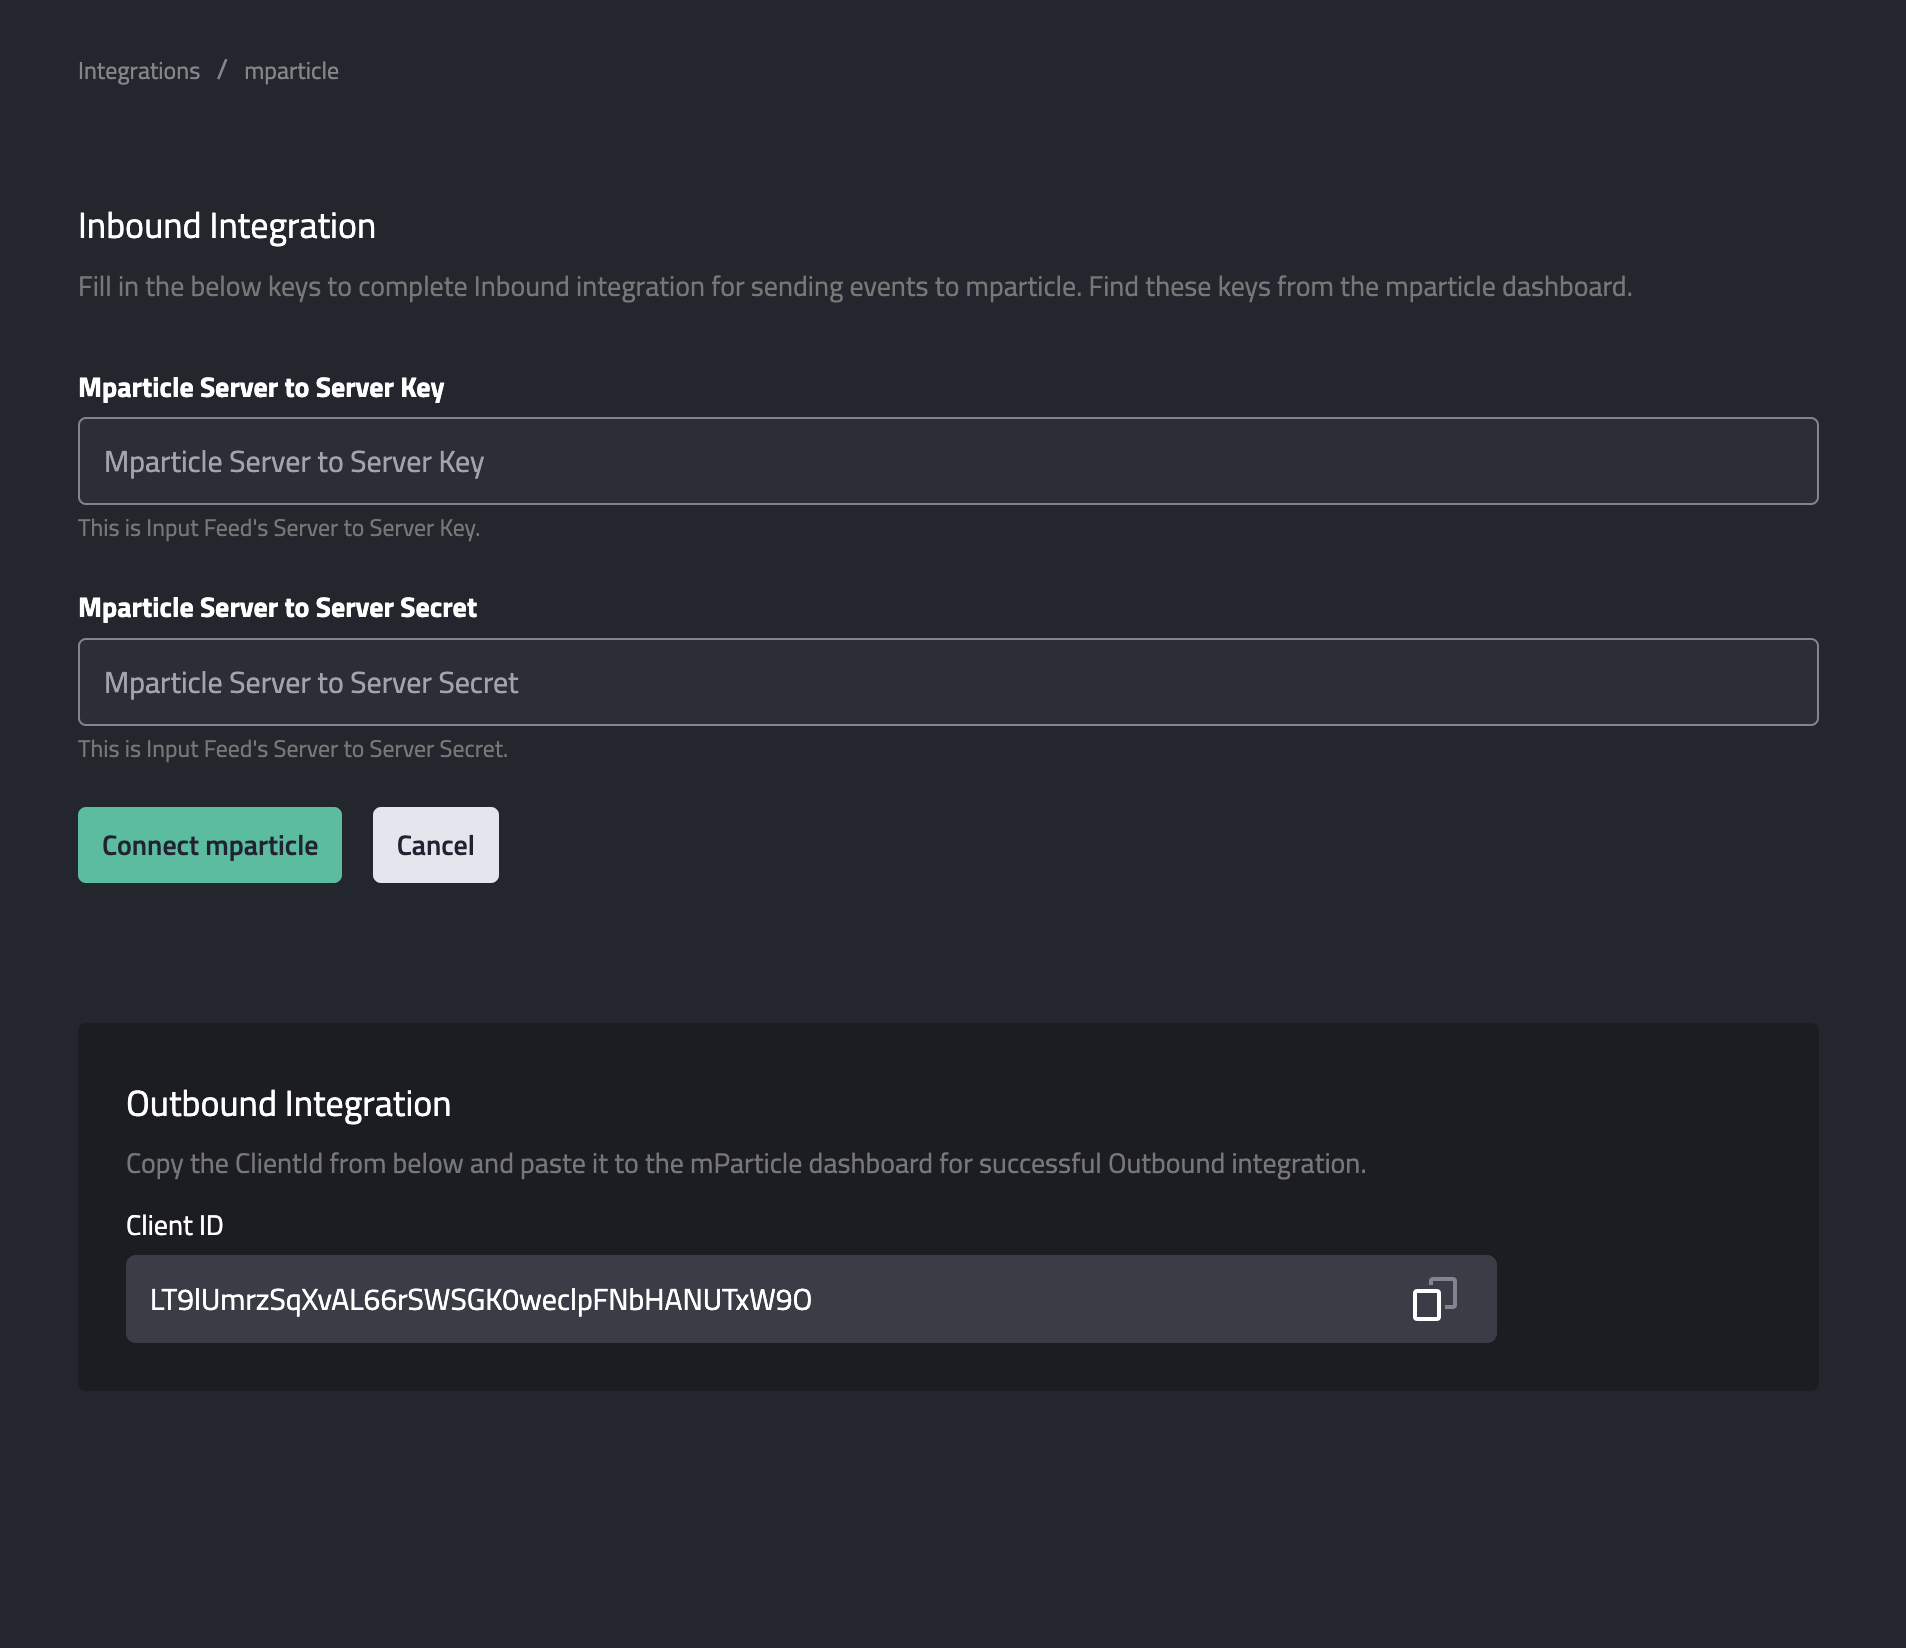
For outbound integration clients can select an input and add LiveLike as an output in the mParticle workspace. They will need to input the apiKey (producer token) which they will get from the LiveLike CMS.
Then all the event data received from the connected inputs will be sent to LiveLike by post api calls.
Automating LiveLike features
This also enables our clients to automate many LiveLike features. Automated features will be initiated by a trigger, such as user sign-in and widget interaction.
LiveLike CMS will provide a dashboard for mParticle outbound integration, where clients can create actions such as widget publishing or rewarding a badge, triggered by an event in an application.
For example:
Custom Reward Actions - Currently implementing custom reward actions involve calling the invoke reward action API. Using our automation features, they can surpass that API call and just pass some additional data such as programid and action key with the track API call they might already be doing.
How to configure Outbound Integration?
Make sure you have an account with mParticleMake sure you have an account with mParticle and have access to their dashboard.
We have made enabling this feature very easy for you and please follow the below steps in LiveLike CMS for integration.
- Navigate to Integrations then look for Mparticle and click Connect button to start integrating.
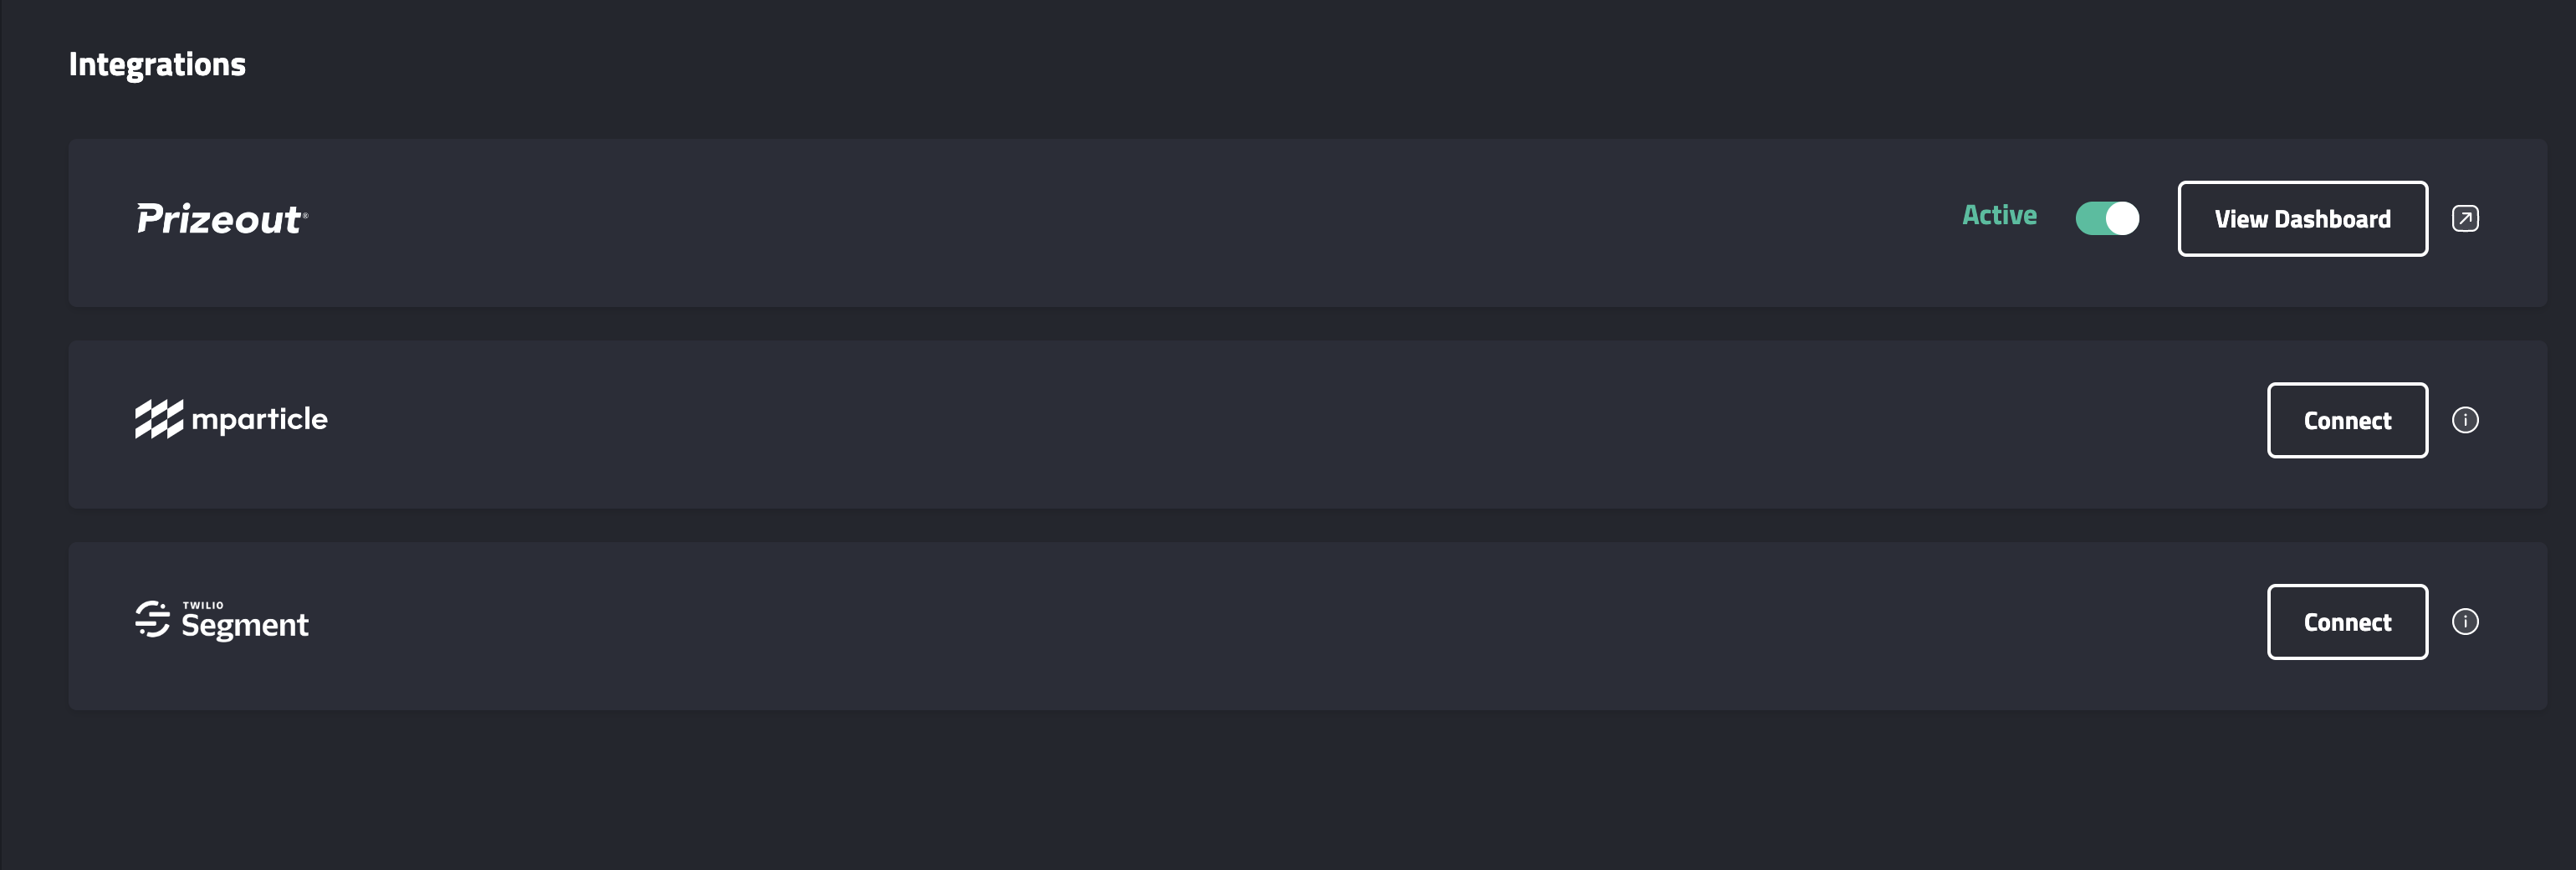
- Copy the Client id
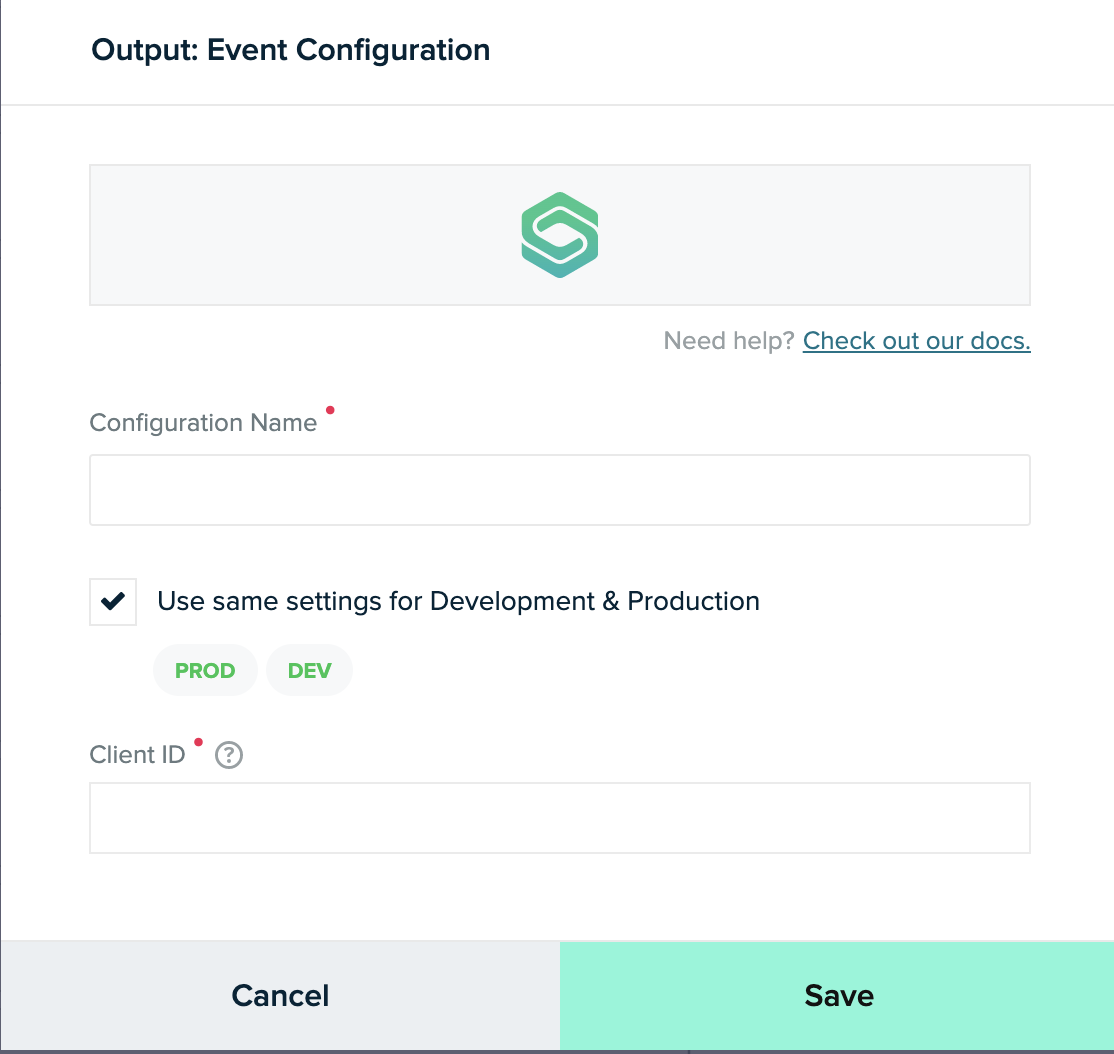
From the Mparticle web app dashboard, navigate to Setup > Outputs. Under the Event Output tab, search for “LiveLike”.
- Paste the corresponding Client ID and Save.
Updated 4 months ago
You will successfully complete Outbound Integration after completing all the above steps. The next step is to set up the Rewards. Please read this documentation to set up rewards.
