Getting Started
Accessing the Suite
You can access the Producer Suite at cf-blast.livelikecdn.com.
To get started, you will need account credentials. You can request these either from LiveLike, or from a member of your team that already has access (see Inviting Your Team).
Suite Layout
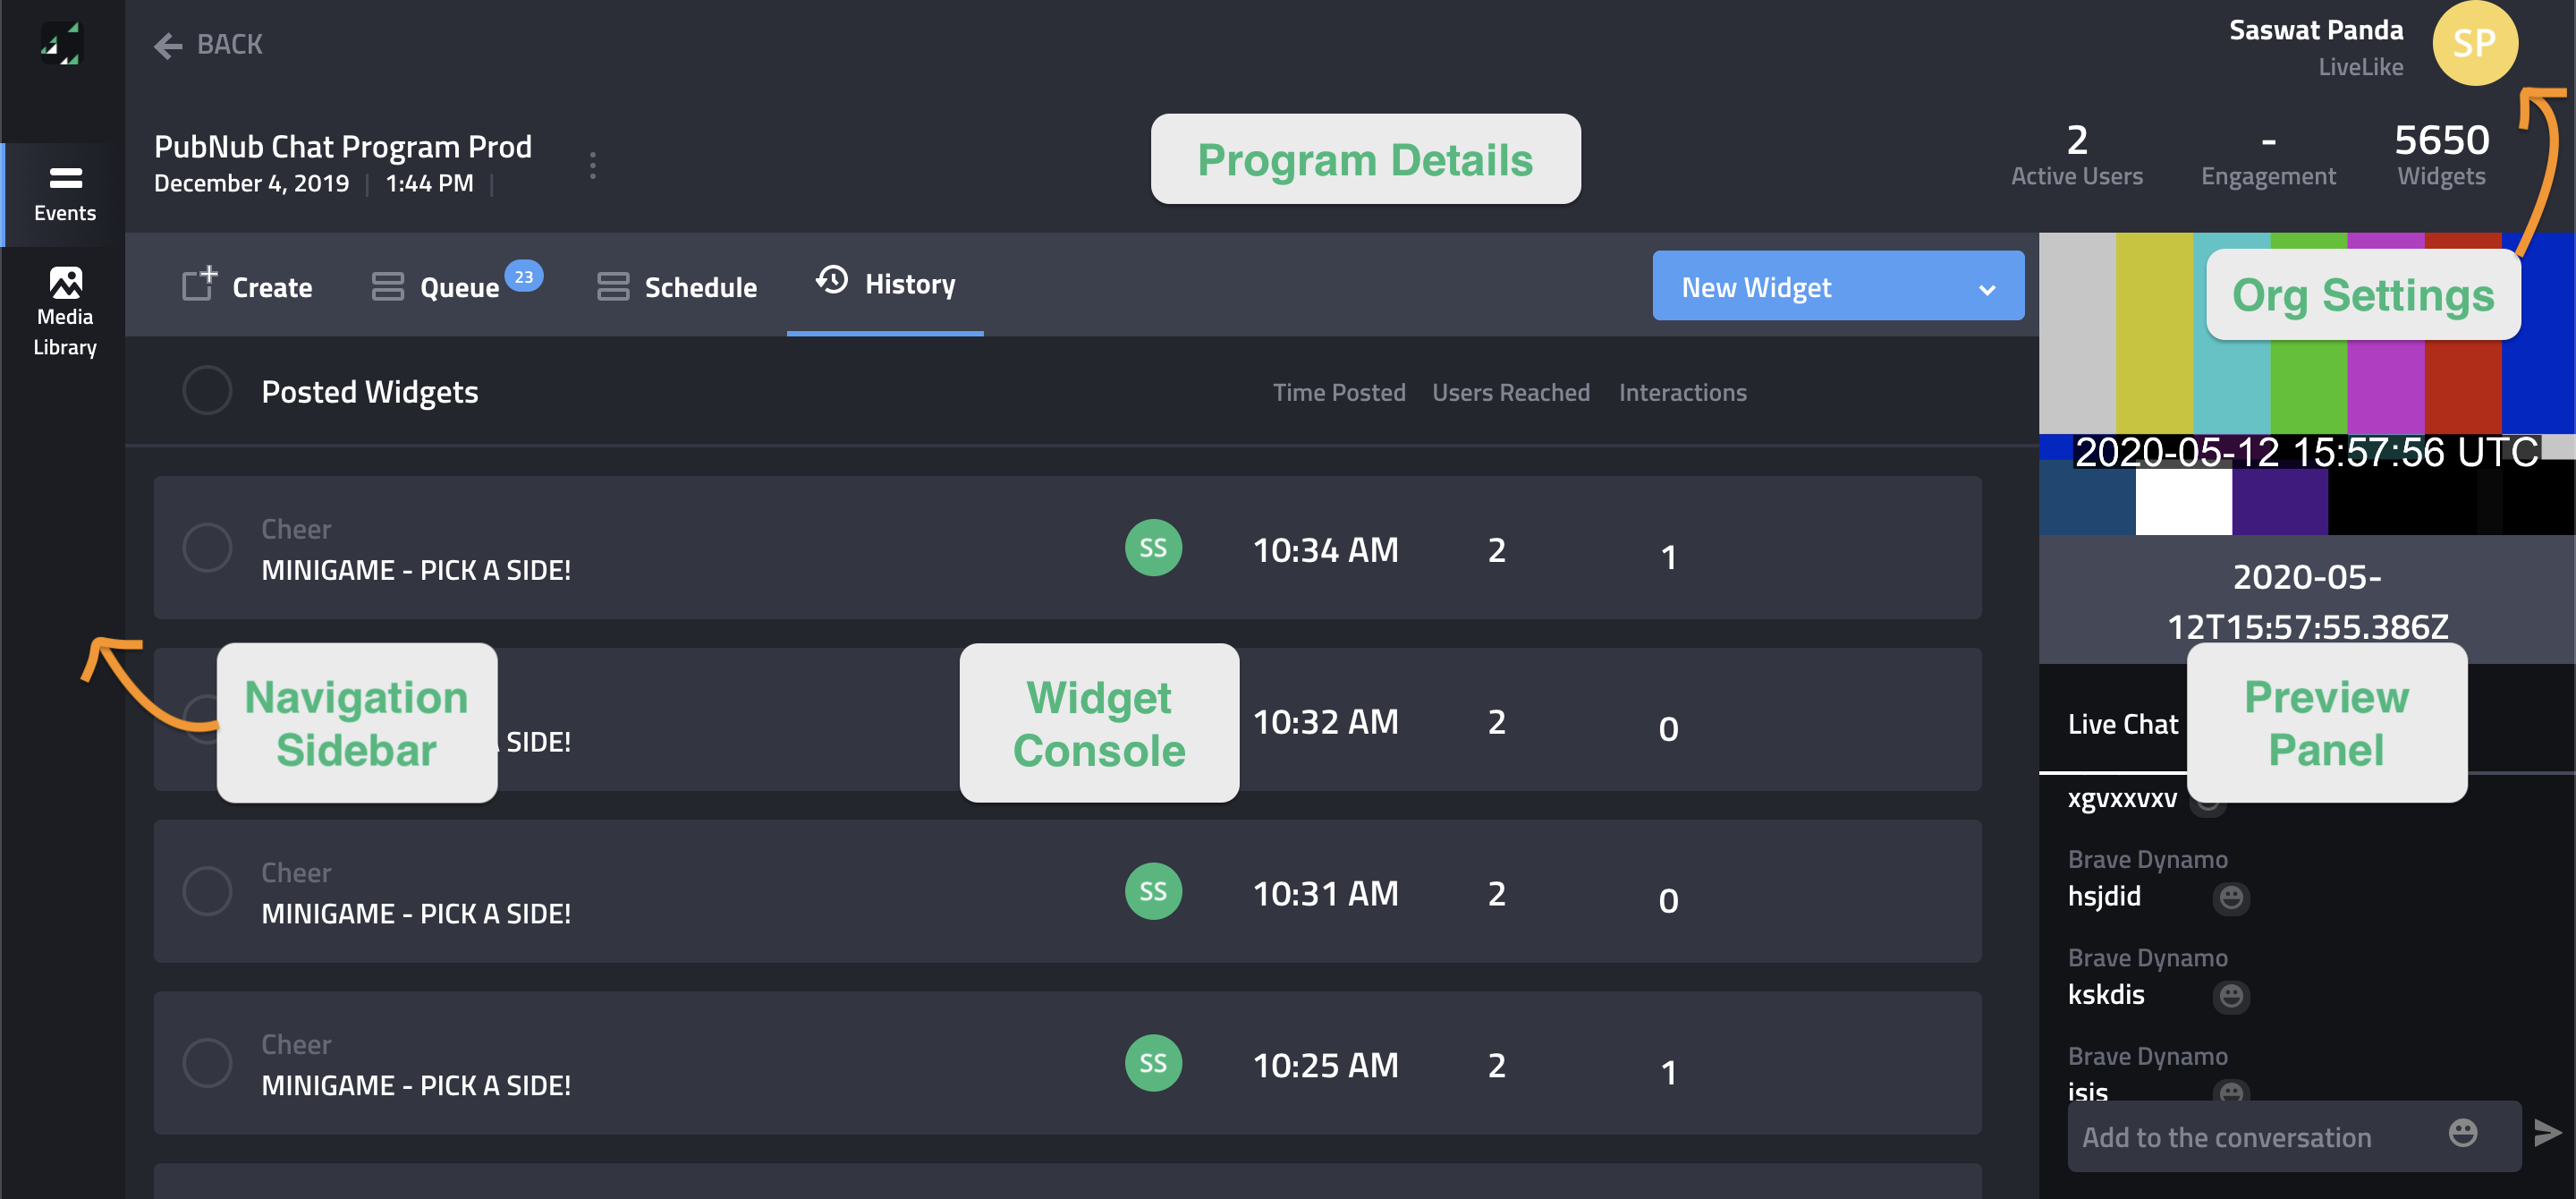
The main components of the Producer Suite are:
- Navigation Sidebar: Access your programs and media library
- Program Details: Details for the currently selected program
- Widget Console: Dashboard for creating, scheduling and viewing history of widgets
- Preview Panel: Web preview of engagement interactions with end-users
- Organization Settings: Manage your app settings and invite others
- Moderation Panel: Monitor reported messages and take action like removing them
Creating a Program
To publish widgets for an event, you will need to create a program associated with that event. You can access the Event Management window through the Navigation Sidebar. The video below shows how you can create your first program.
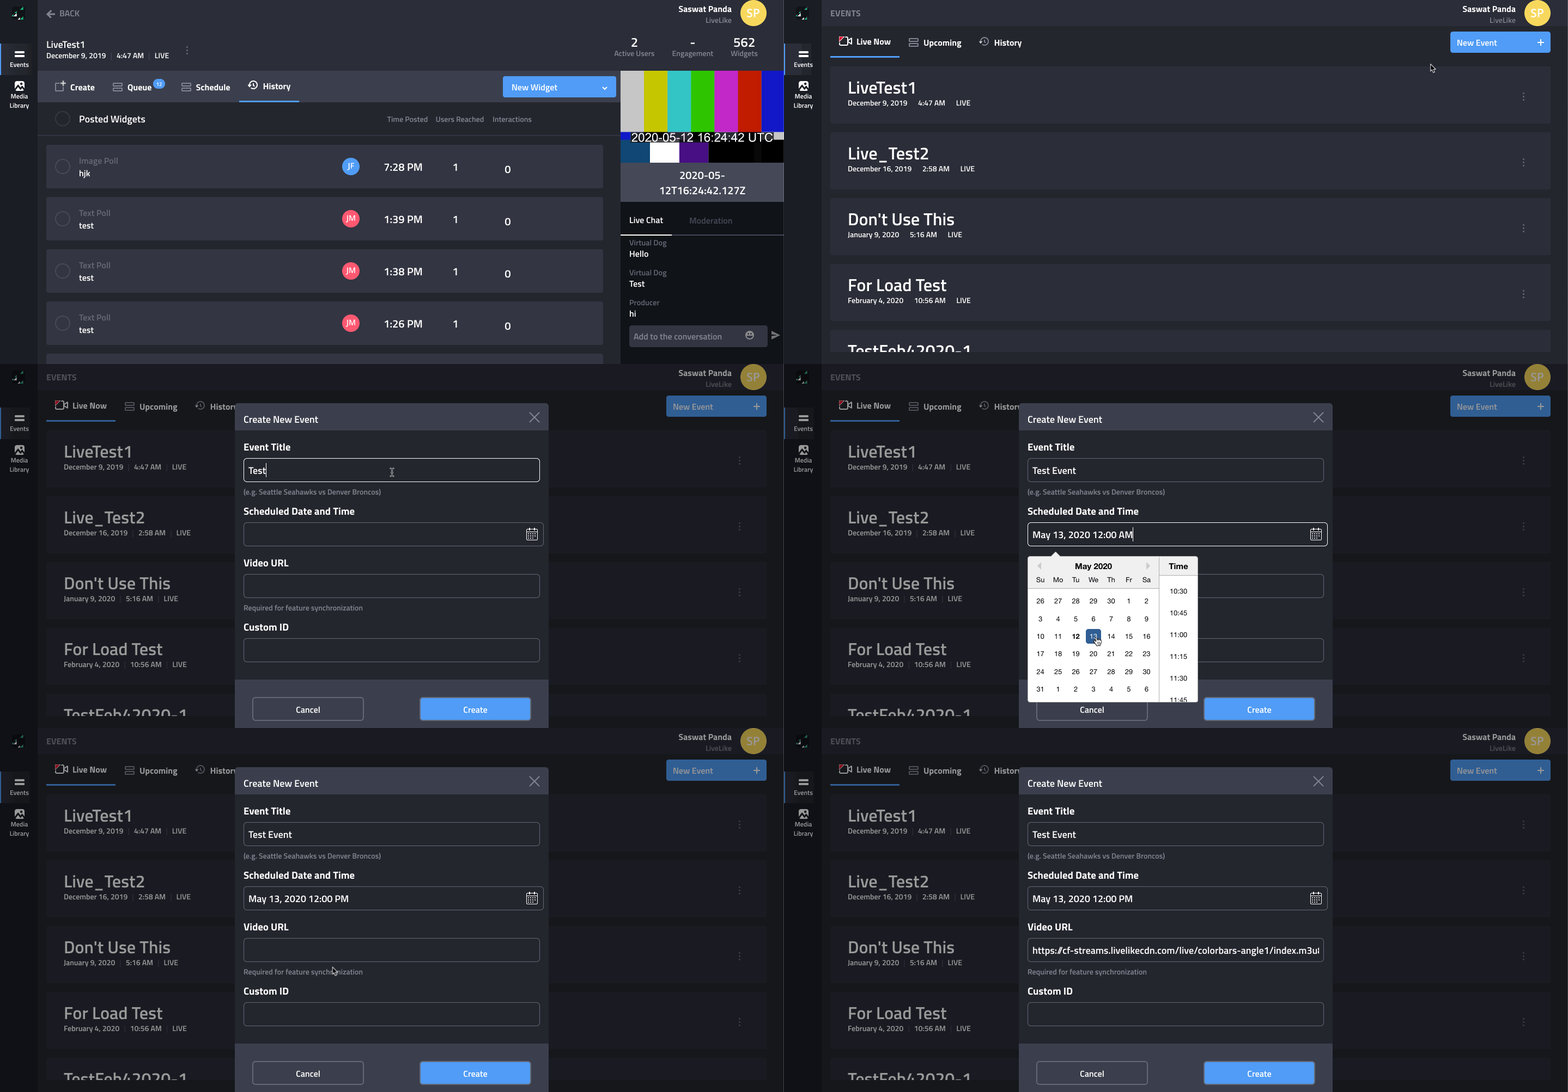
Each event has the following fields:
- Event Title: An event name for your tracking purposes.
- Scheduled Date & Time: The start time of the event. This is for your tracking purposes and only determines the sort order & tab that the event appears on.
- Video URL: An optional video preview URL, which is required if you are looking to use Spoiler Prevention. The stream must follow these requirements.
- Custom ID: An optional custom identifier that you can use to query this particular event through our REST APIs. For example, this could be your internal match ID.
The Event Management Panel has 3 tabs. Note that these tabs are purely for organization and do not affect product functionality:
- Live Now: Displays all events that are currently live. To mark an event as "live", you will need to select "Start Event" as shown below.
- Upcoming: Displays all non-live events with a "scheduled date & time" in the future
- History: Displays all non-live events with a "scheduled date & time" in the past
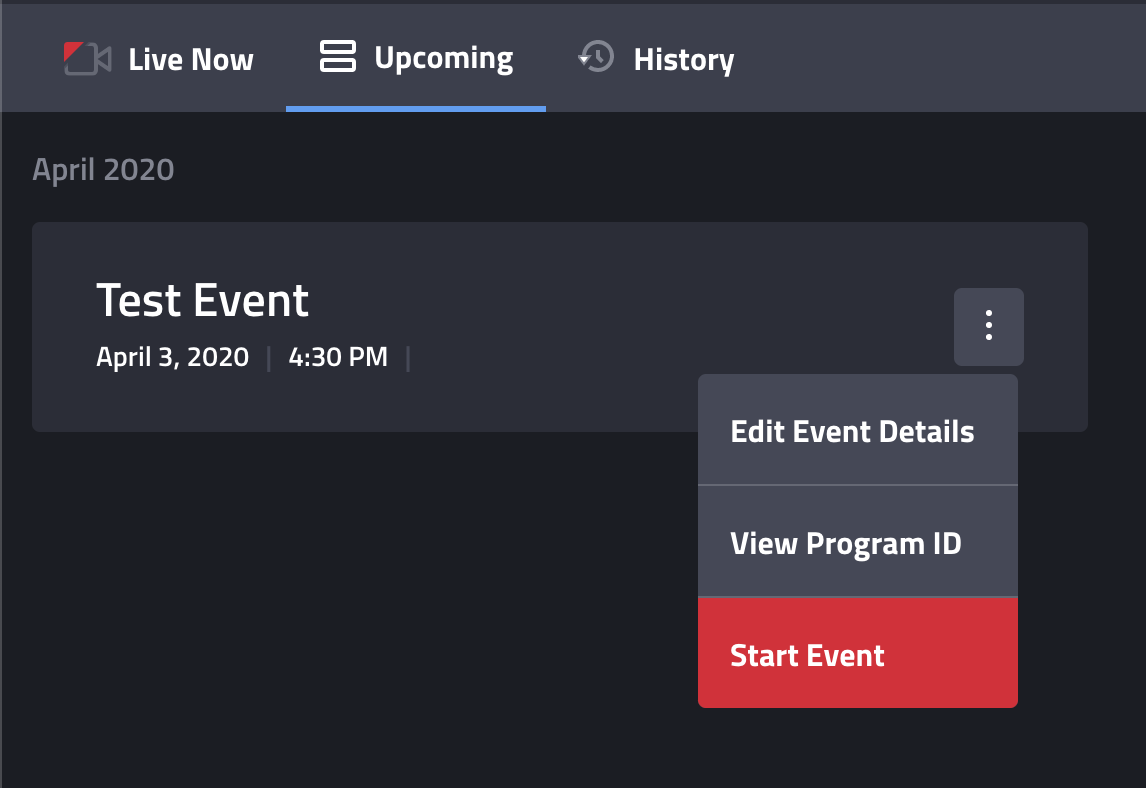
Selecting "Start Event" will move the event to the "Live Now" tab
Publishing Widgets
The Producer Suite allows you to publish a wide array of widgets. The video above shows how you can publish an Image Quiz, the rest are similar. Give them a shot!
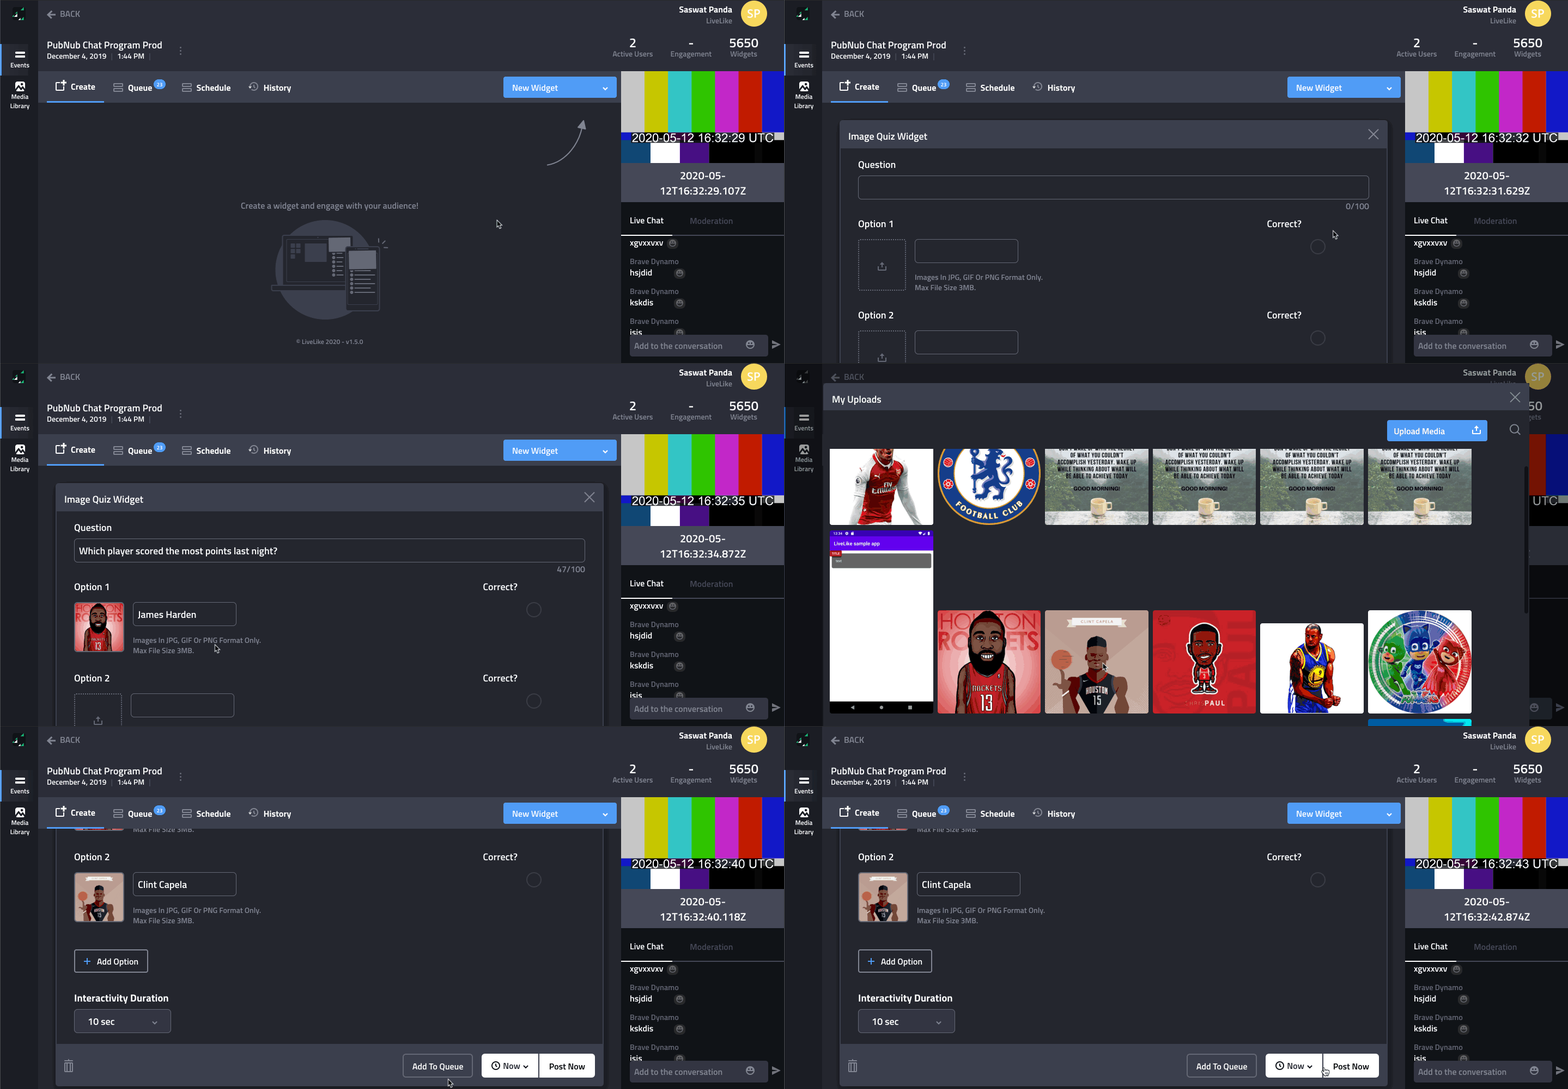
When creating widgets, you have 3 options:
- Queue: Selecting the "Add to Queue" will adds the widget to a drafting board and it can be accessed later from the "Queue" tab.
- Schedule: Selecting a time from the timepicker labelled "Now" will allow you to schedule a widget for a later time.
- Publish Now: Hitting "Post Now" without changing the time (default to "Now") will result in the widget being published immediately.
Note: Widgets in the Queue, Schedule and History tabs can be duplicated, thereby allowing you to post the same widget multiple times or quickly try variations on successful widgets.
Chat Moderation
The Preview Panel also allows you to moderate chat content.
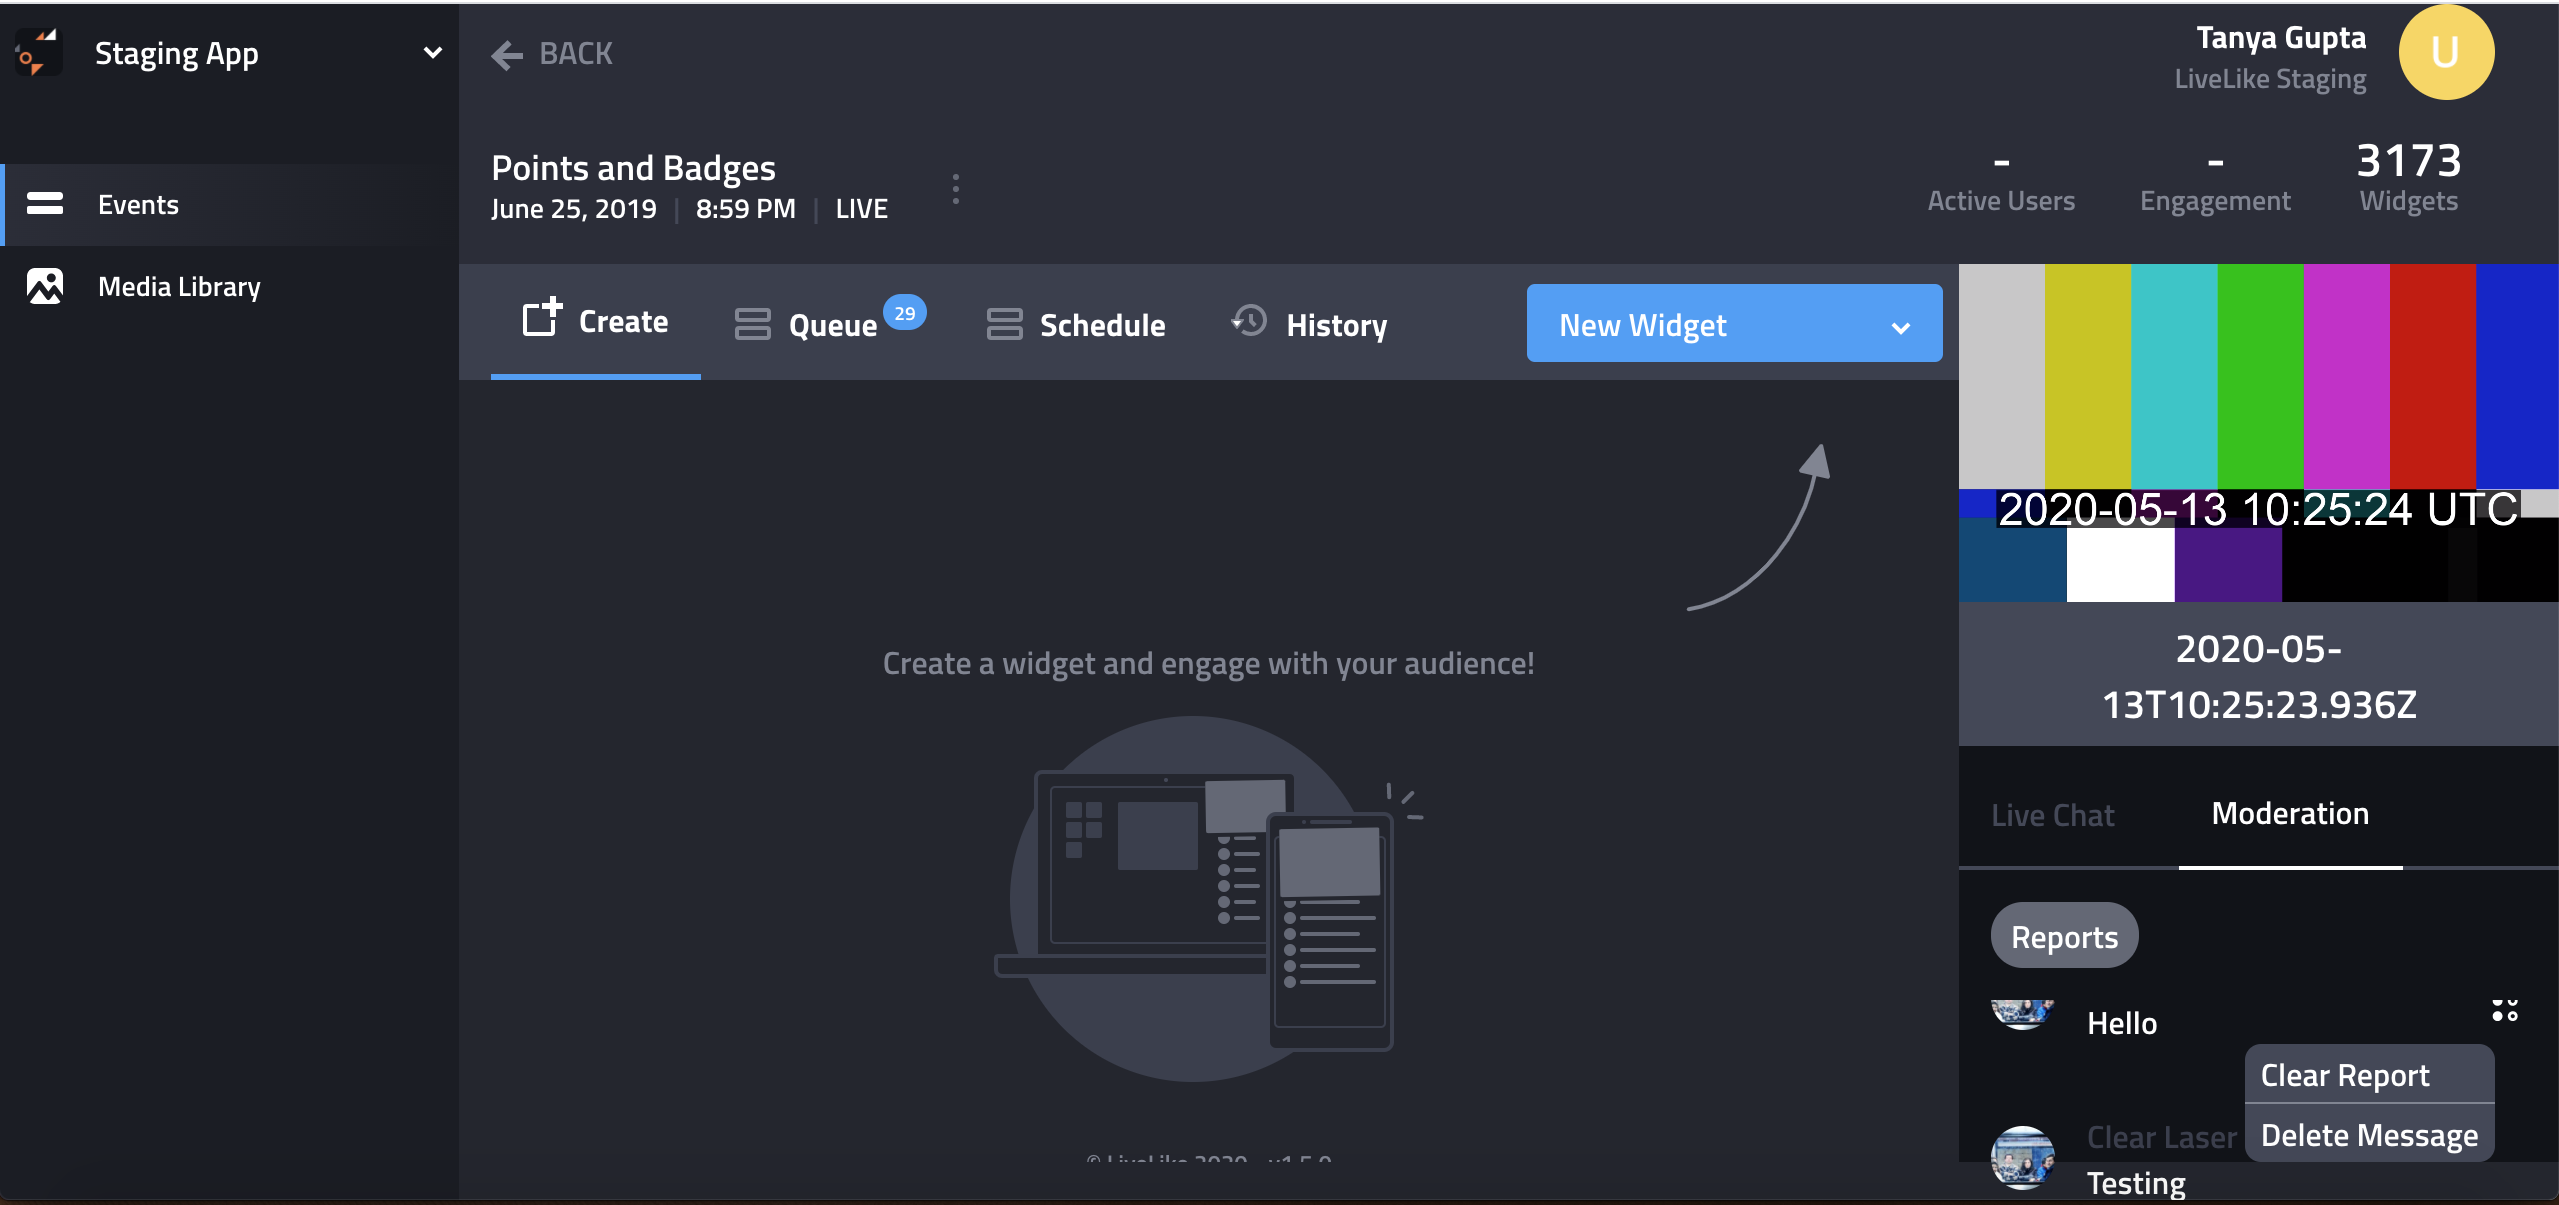
Select the "Moderation" tab, where you can see all messages reported by users and perform the following actions:
- Clear Report: The report is cleared from the system and the chat message is visible to all users
- Delete Message: Shadow-Mutes the message
Personalised Chat Nickname
The Preview Panel allows you to view and update your Chat NickName. The video below shows how you can update your Chat NickName.
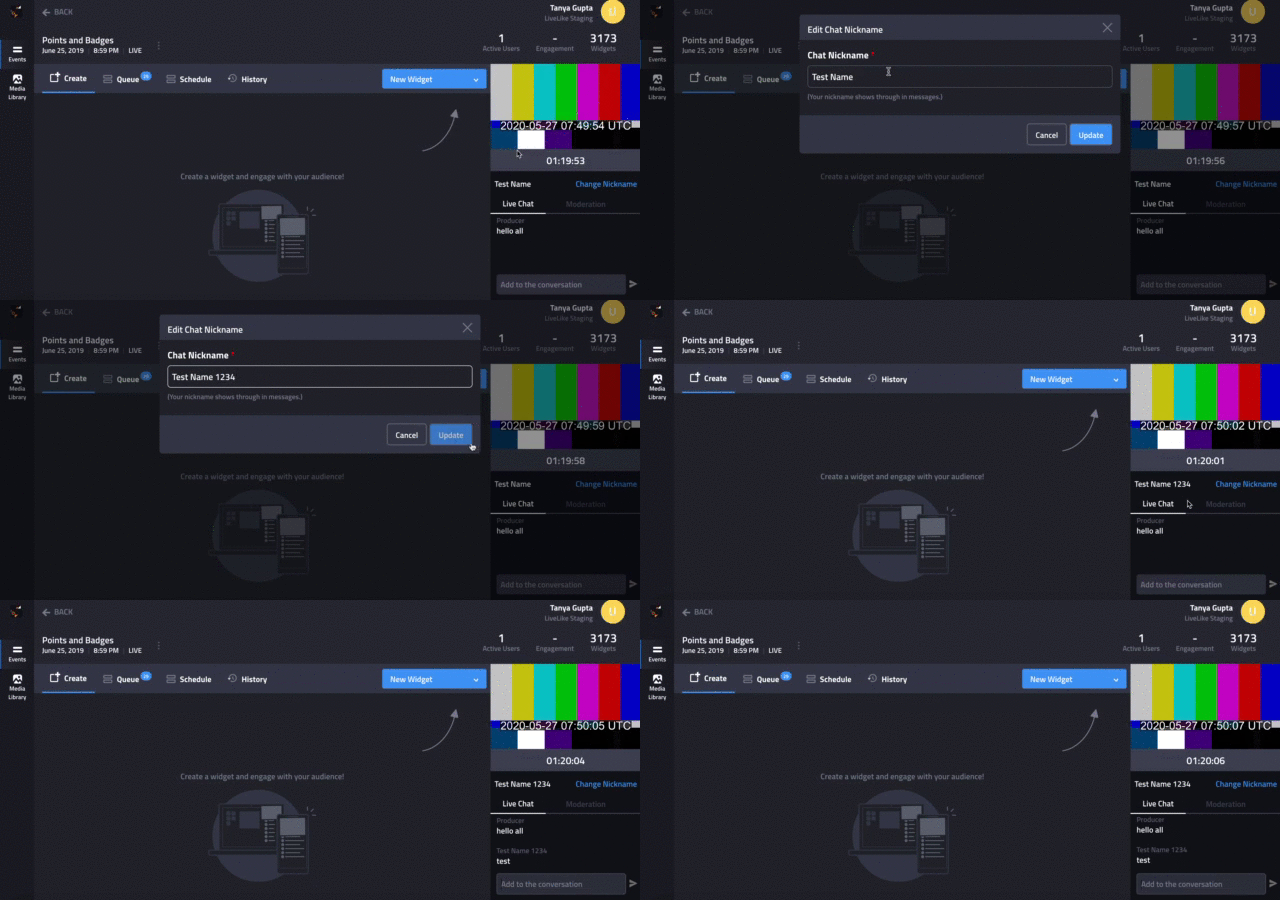
Steps:
- Click on "Change NickName"
- Fill up the new NickName
- Click "Update"
Sticker Packs
Producers can access Sticker Packs available in the Application from the Sidebar
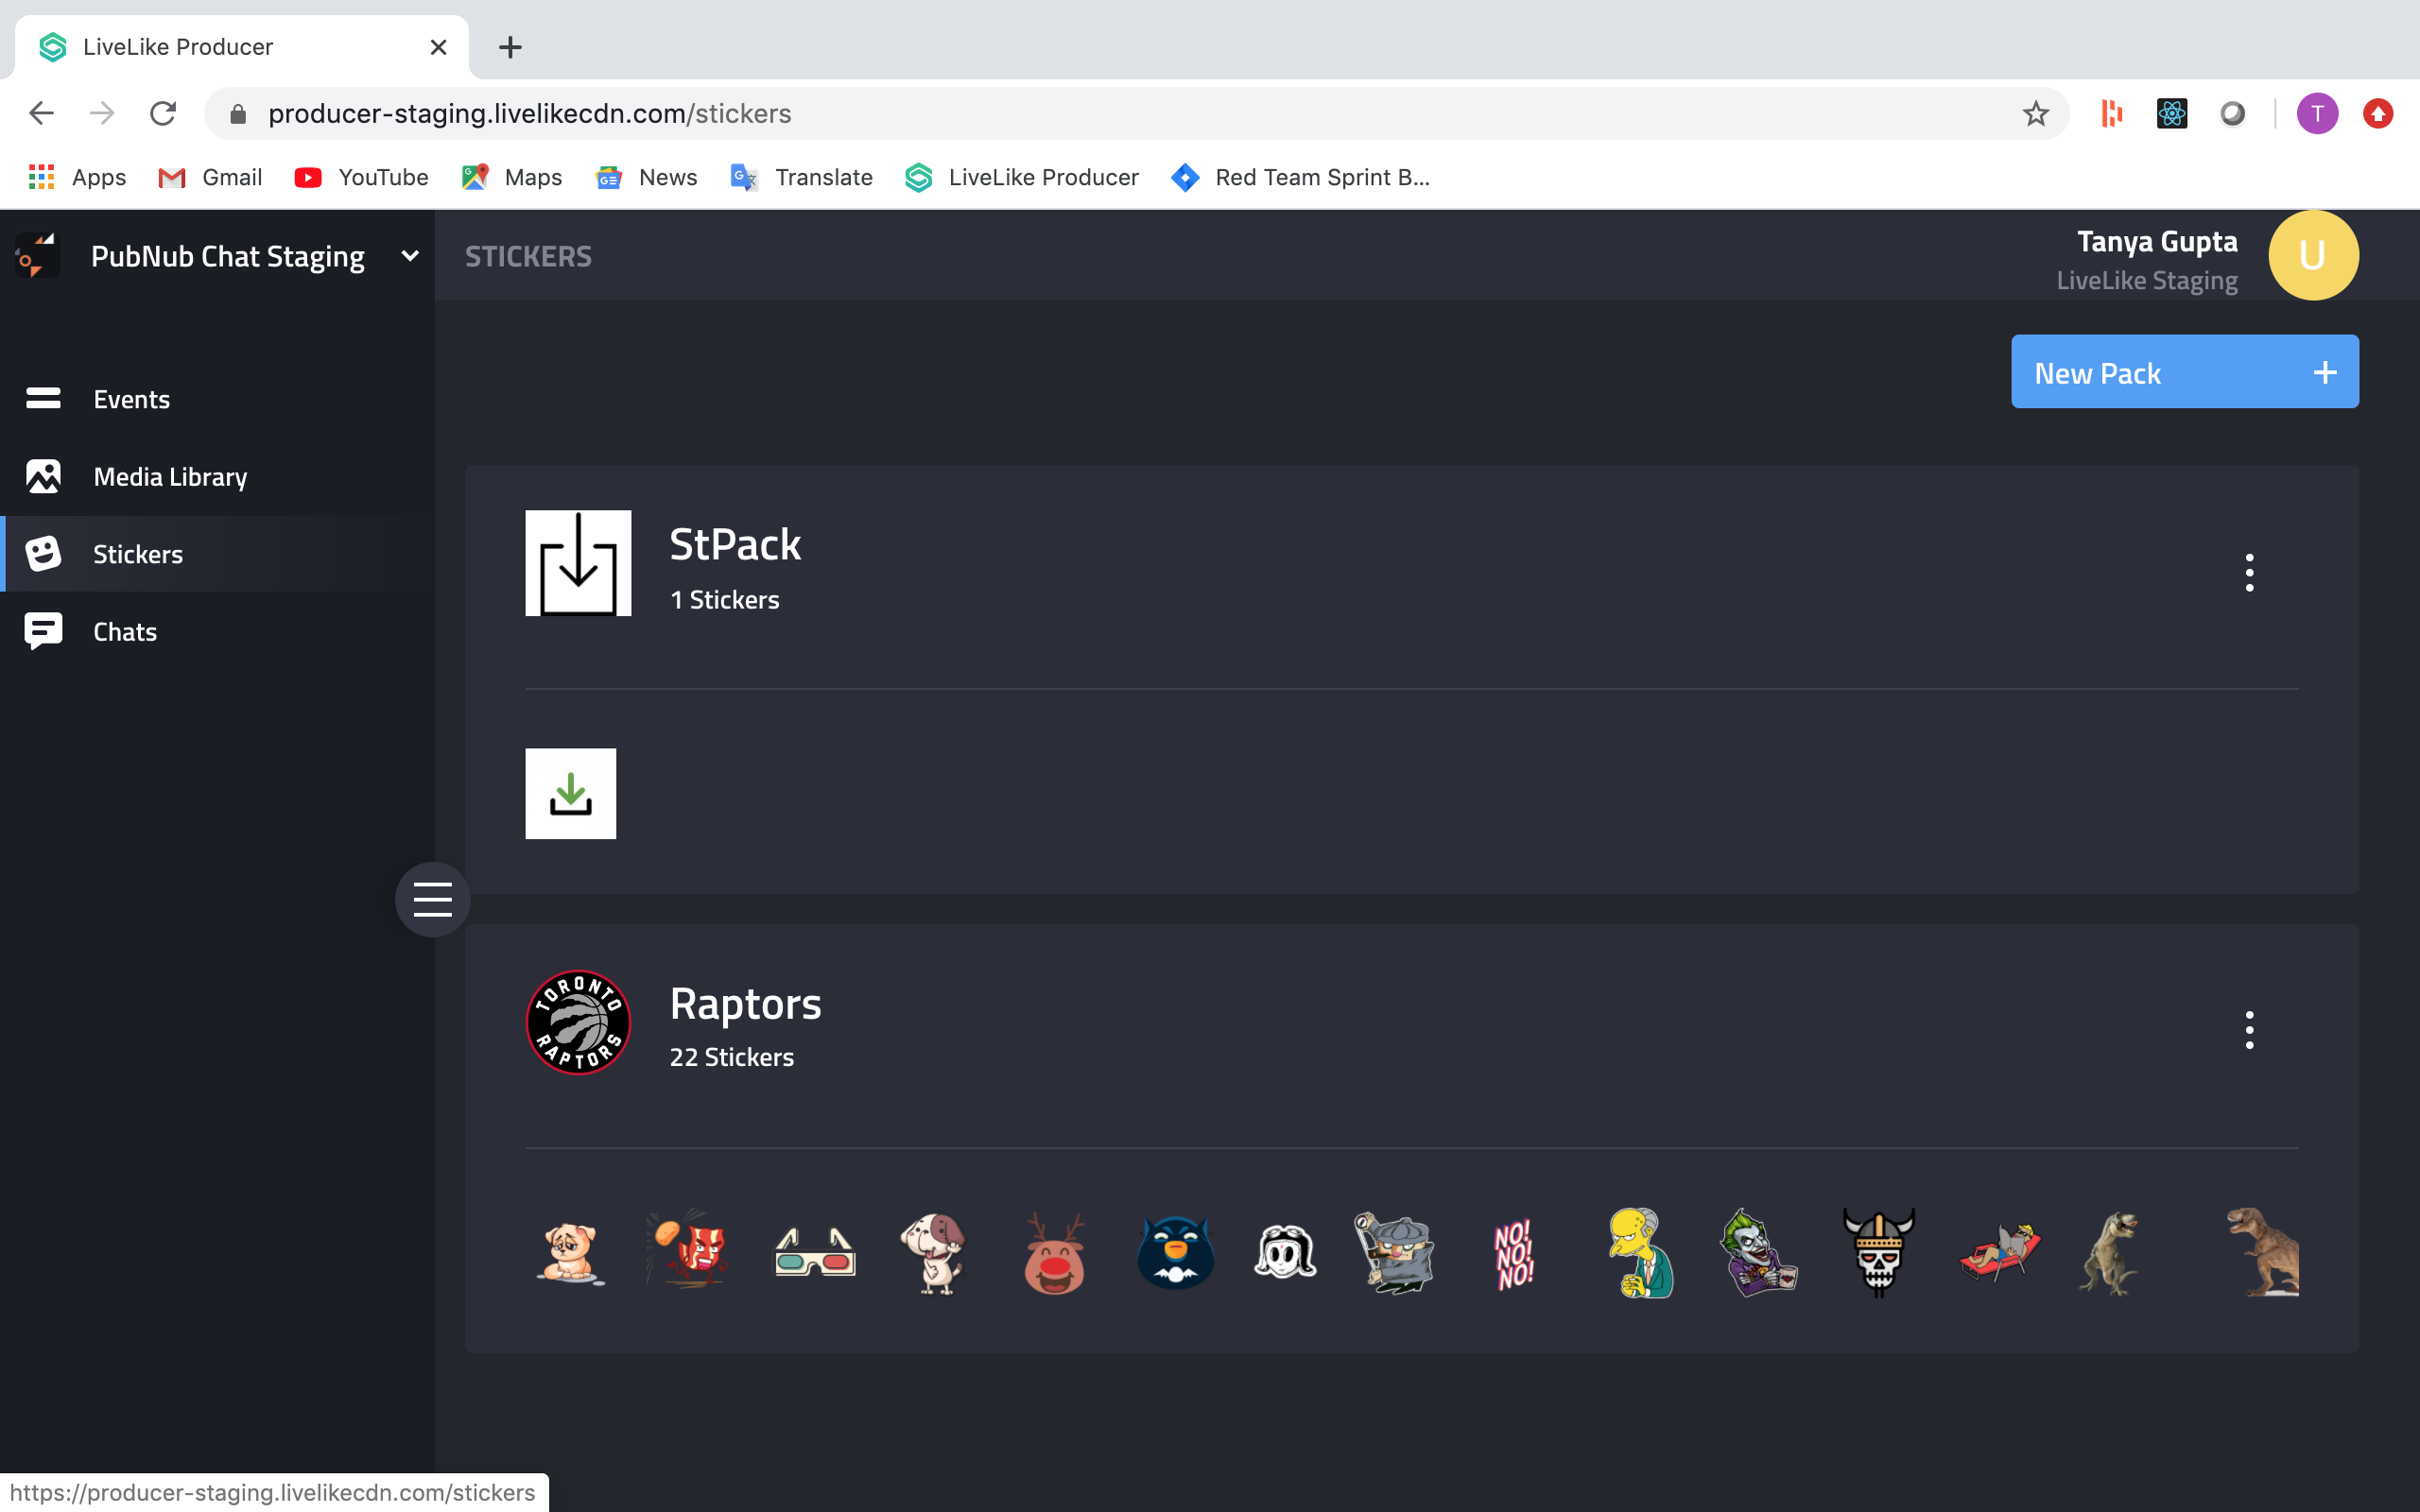
Producers can see the detail of any Sticker Pack by clicking on the Sticker Pack card
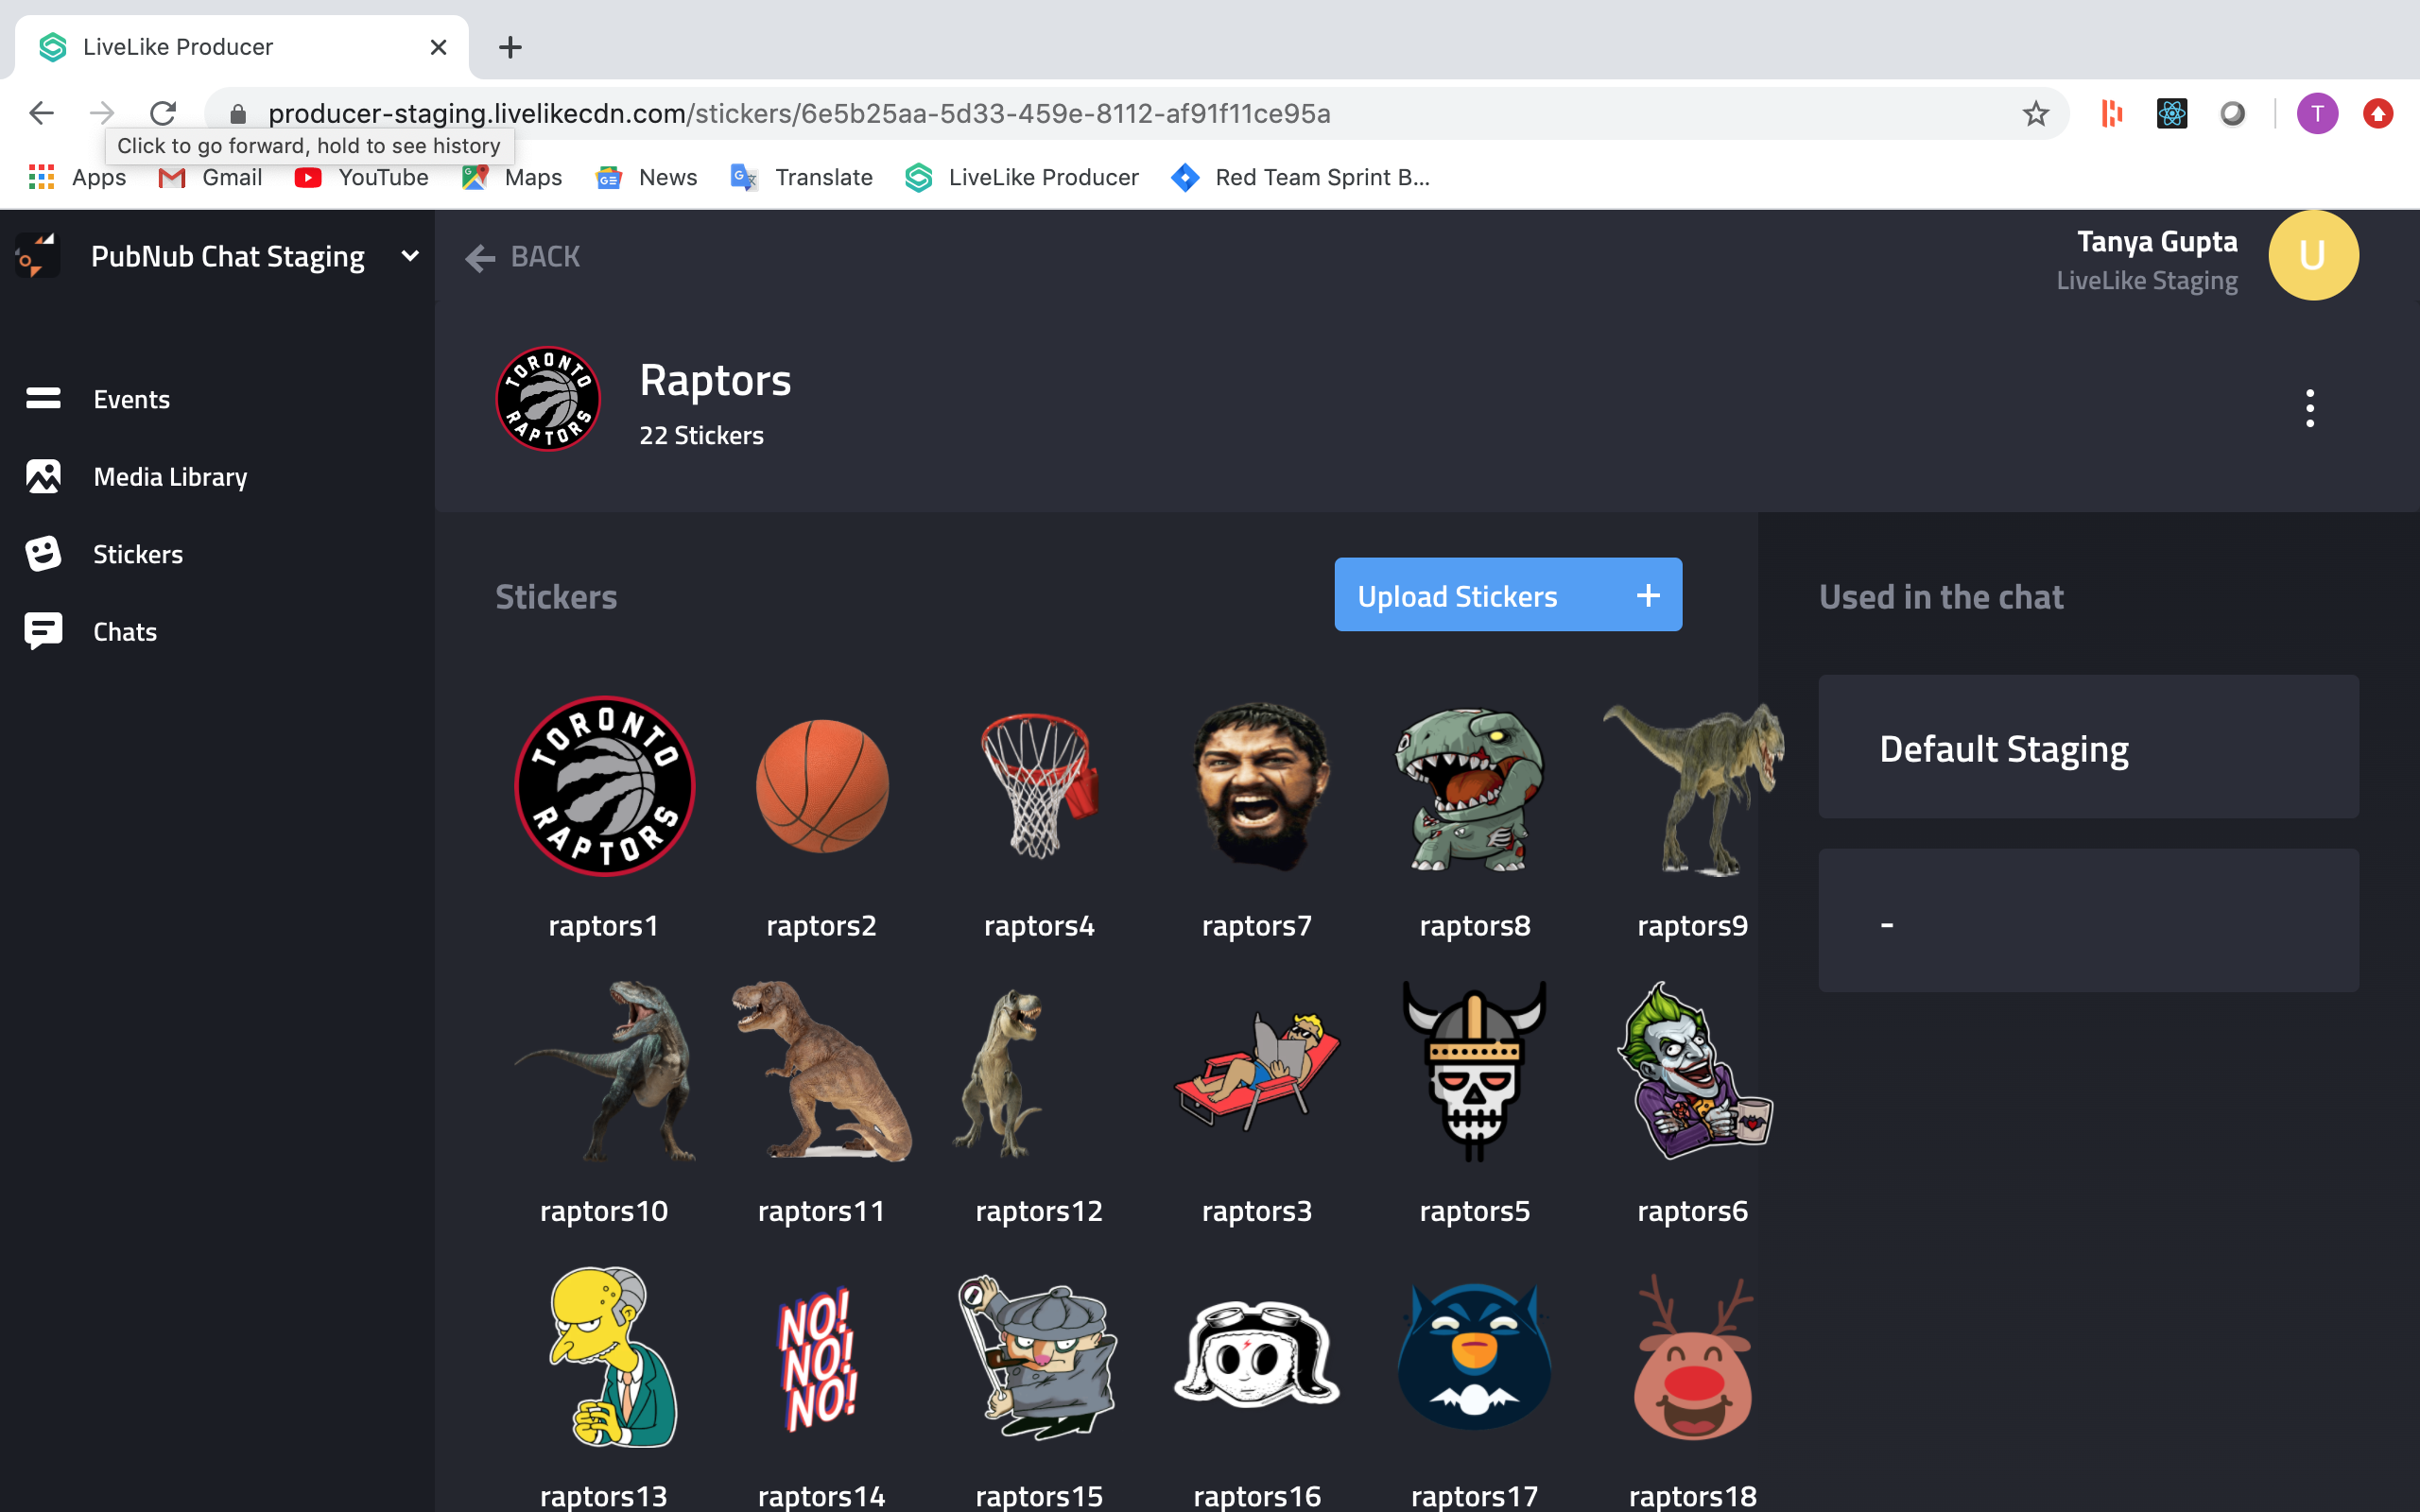
In the Sticker Pack Detail - Producers can Add/Edit/Delete Stickers in the Pack
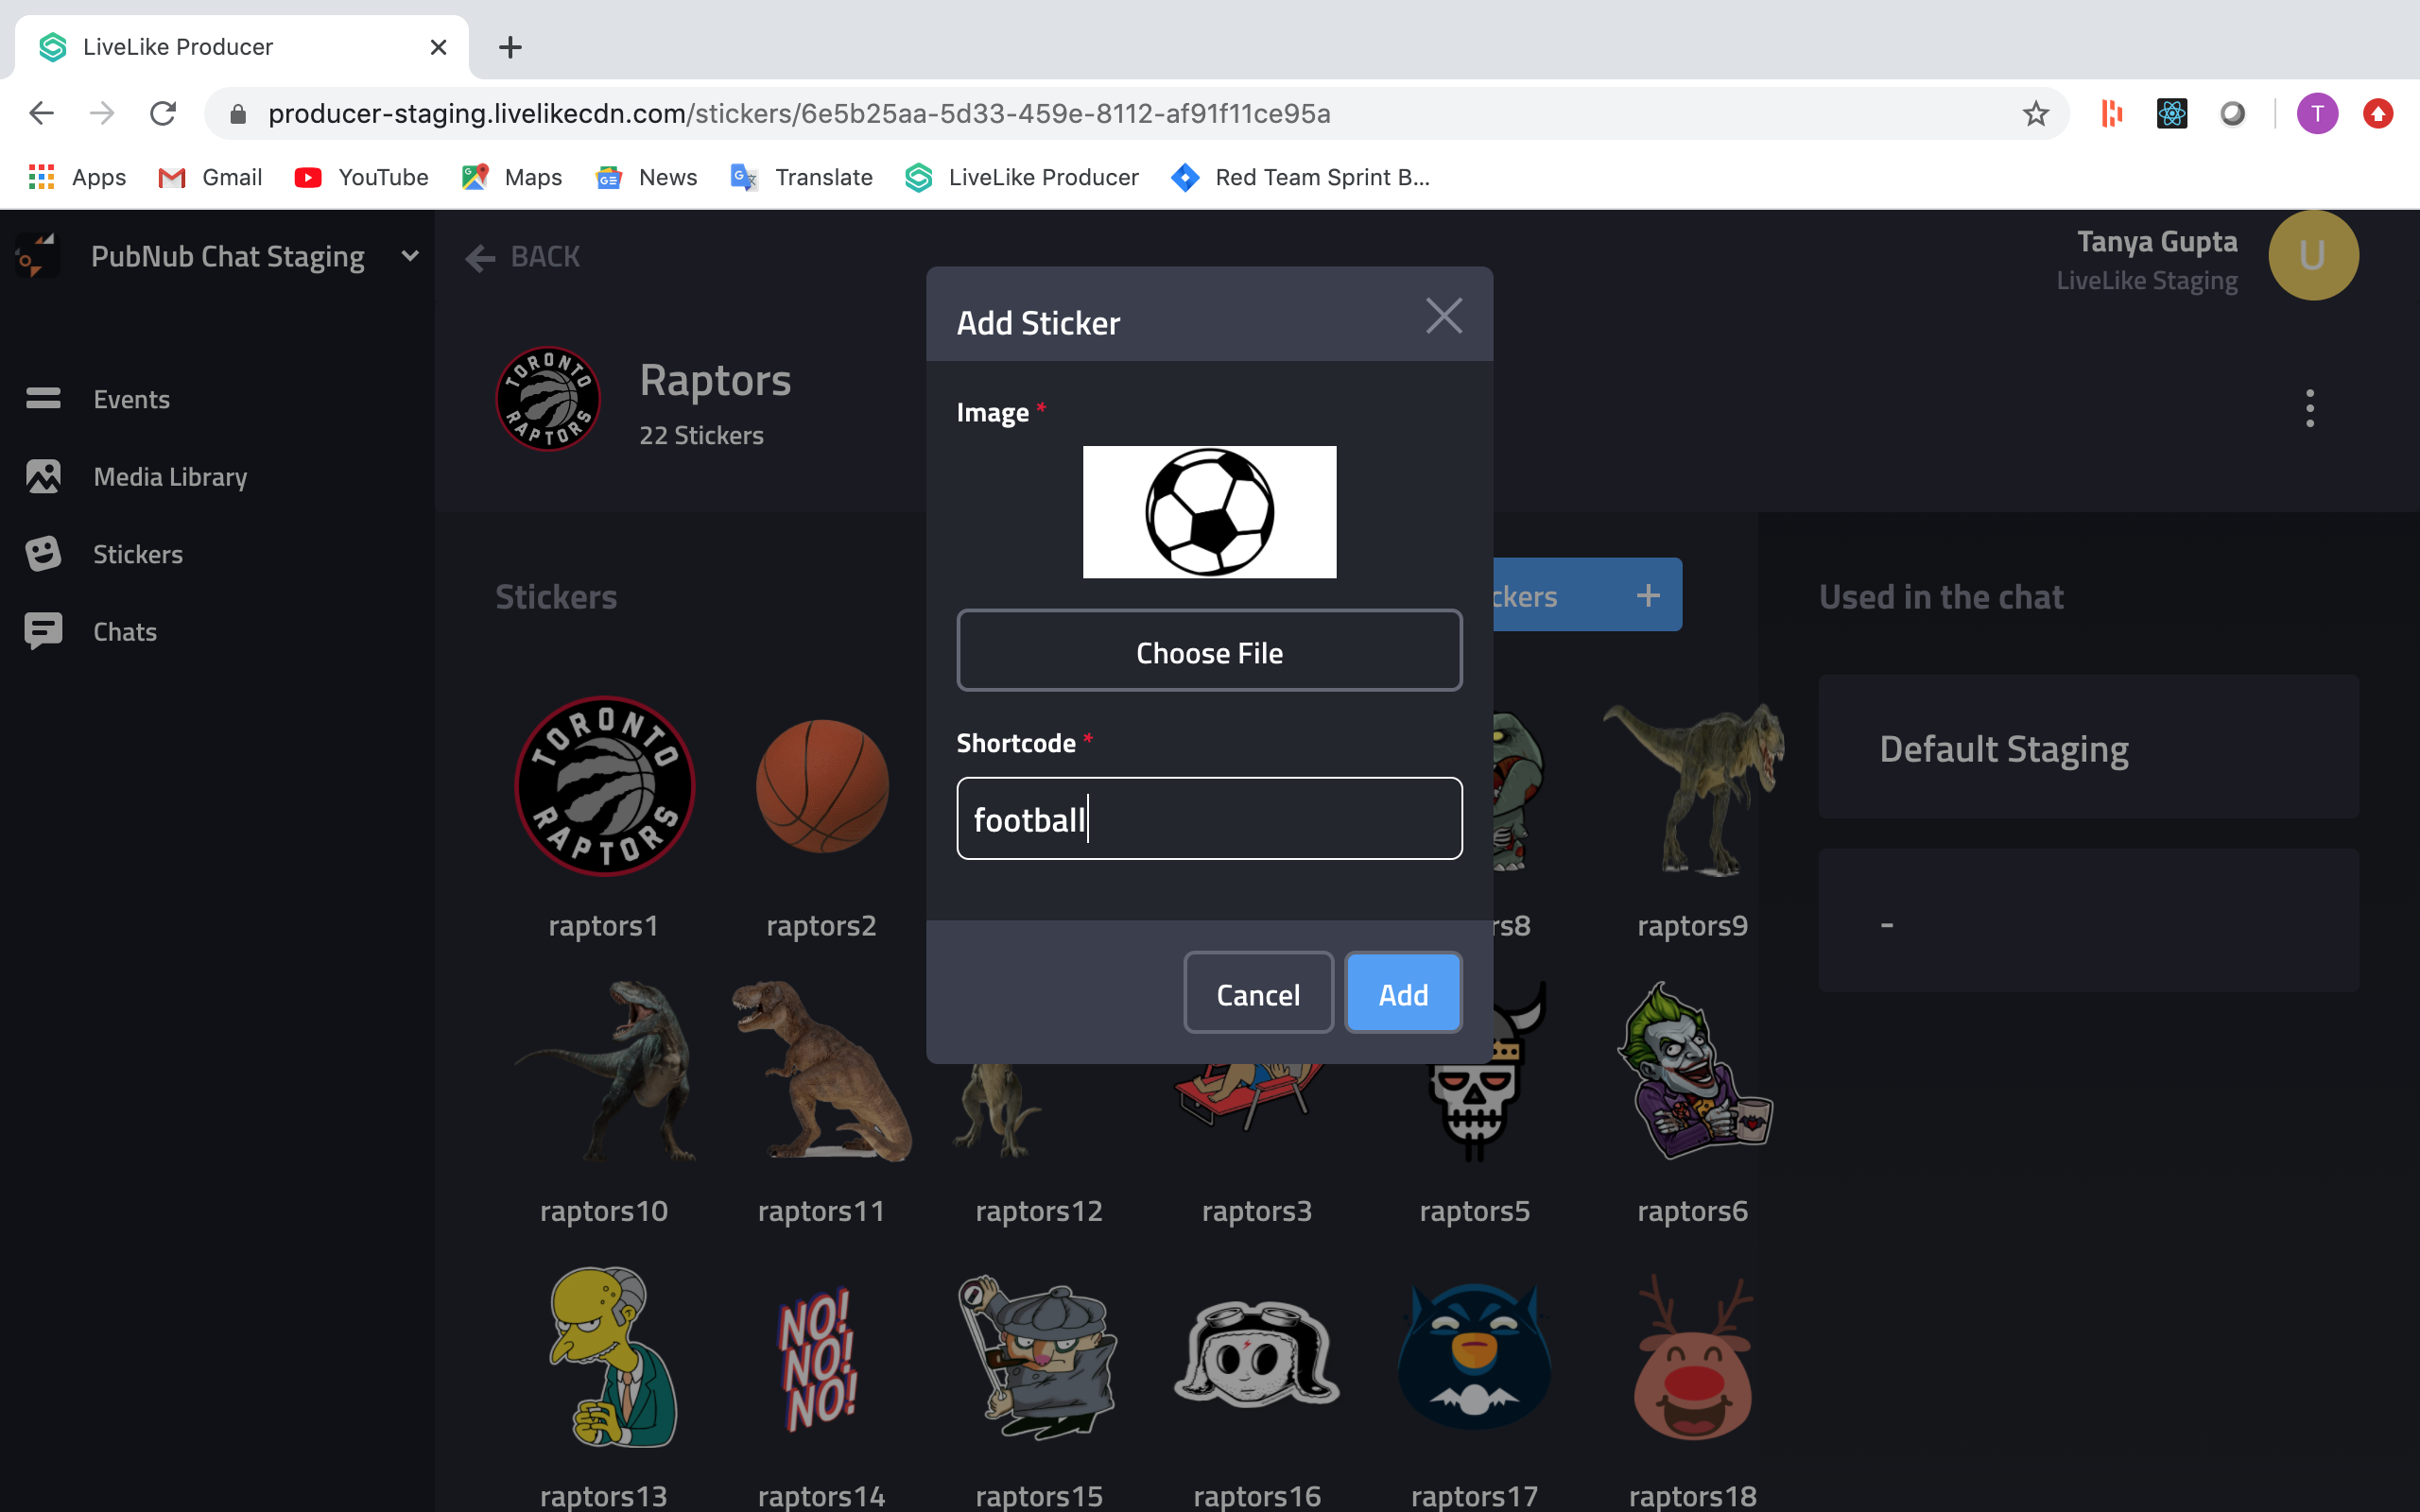
Every Sticker has following fields:
Image The image which will be seen in chat
Shortcode This is the code which represents a sticker in the chat
Creating a Sticker Pack
Producers can create a new Sticker Pack from the Stickers screen
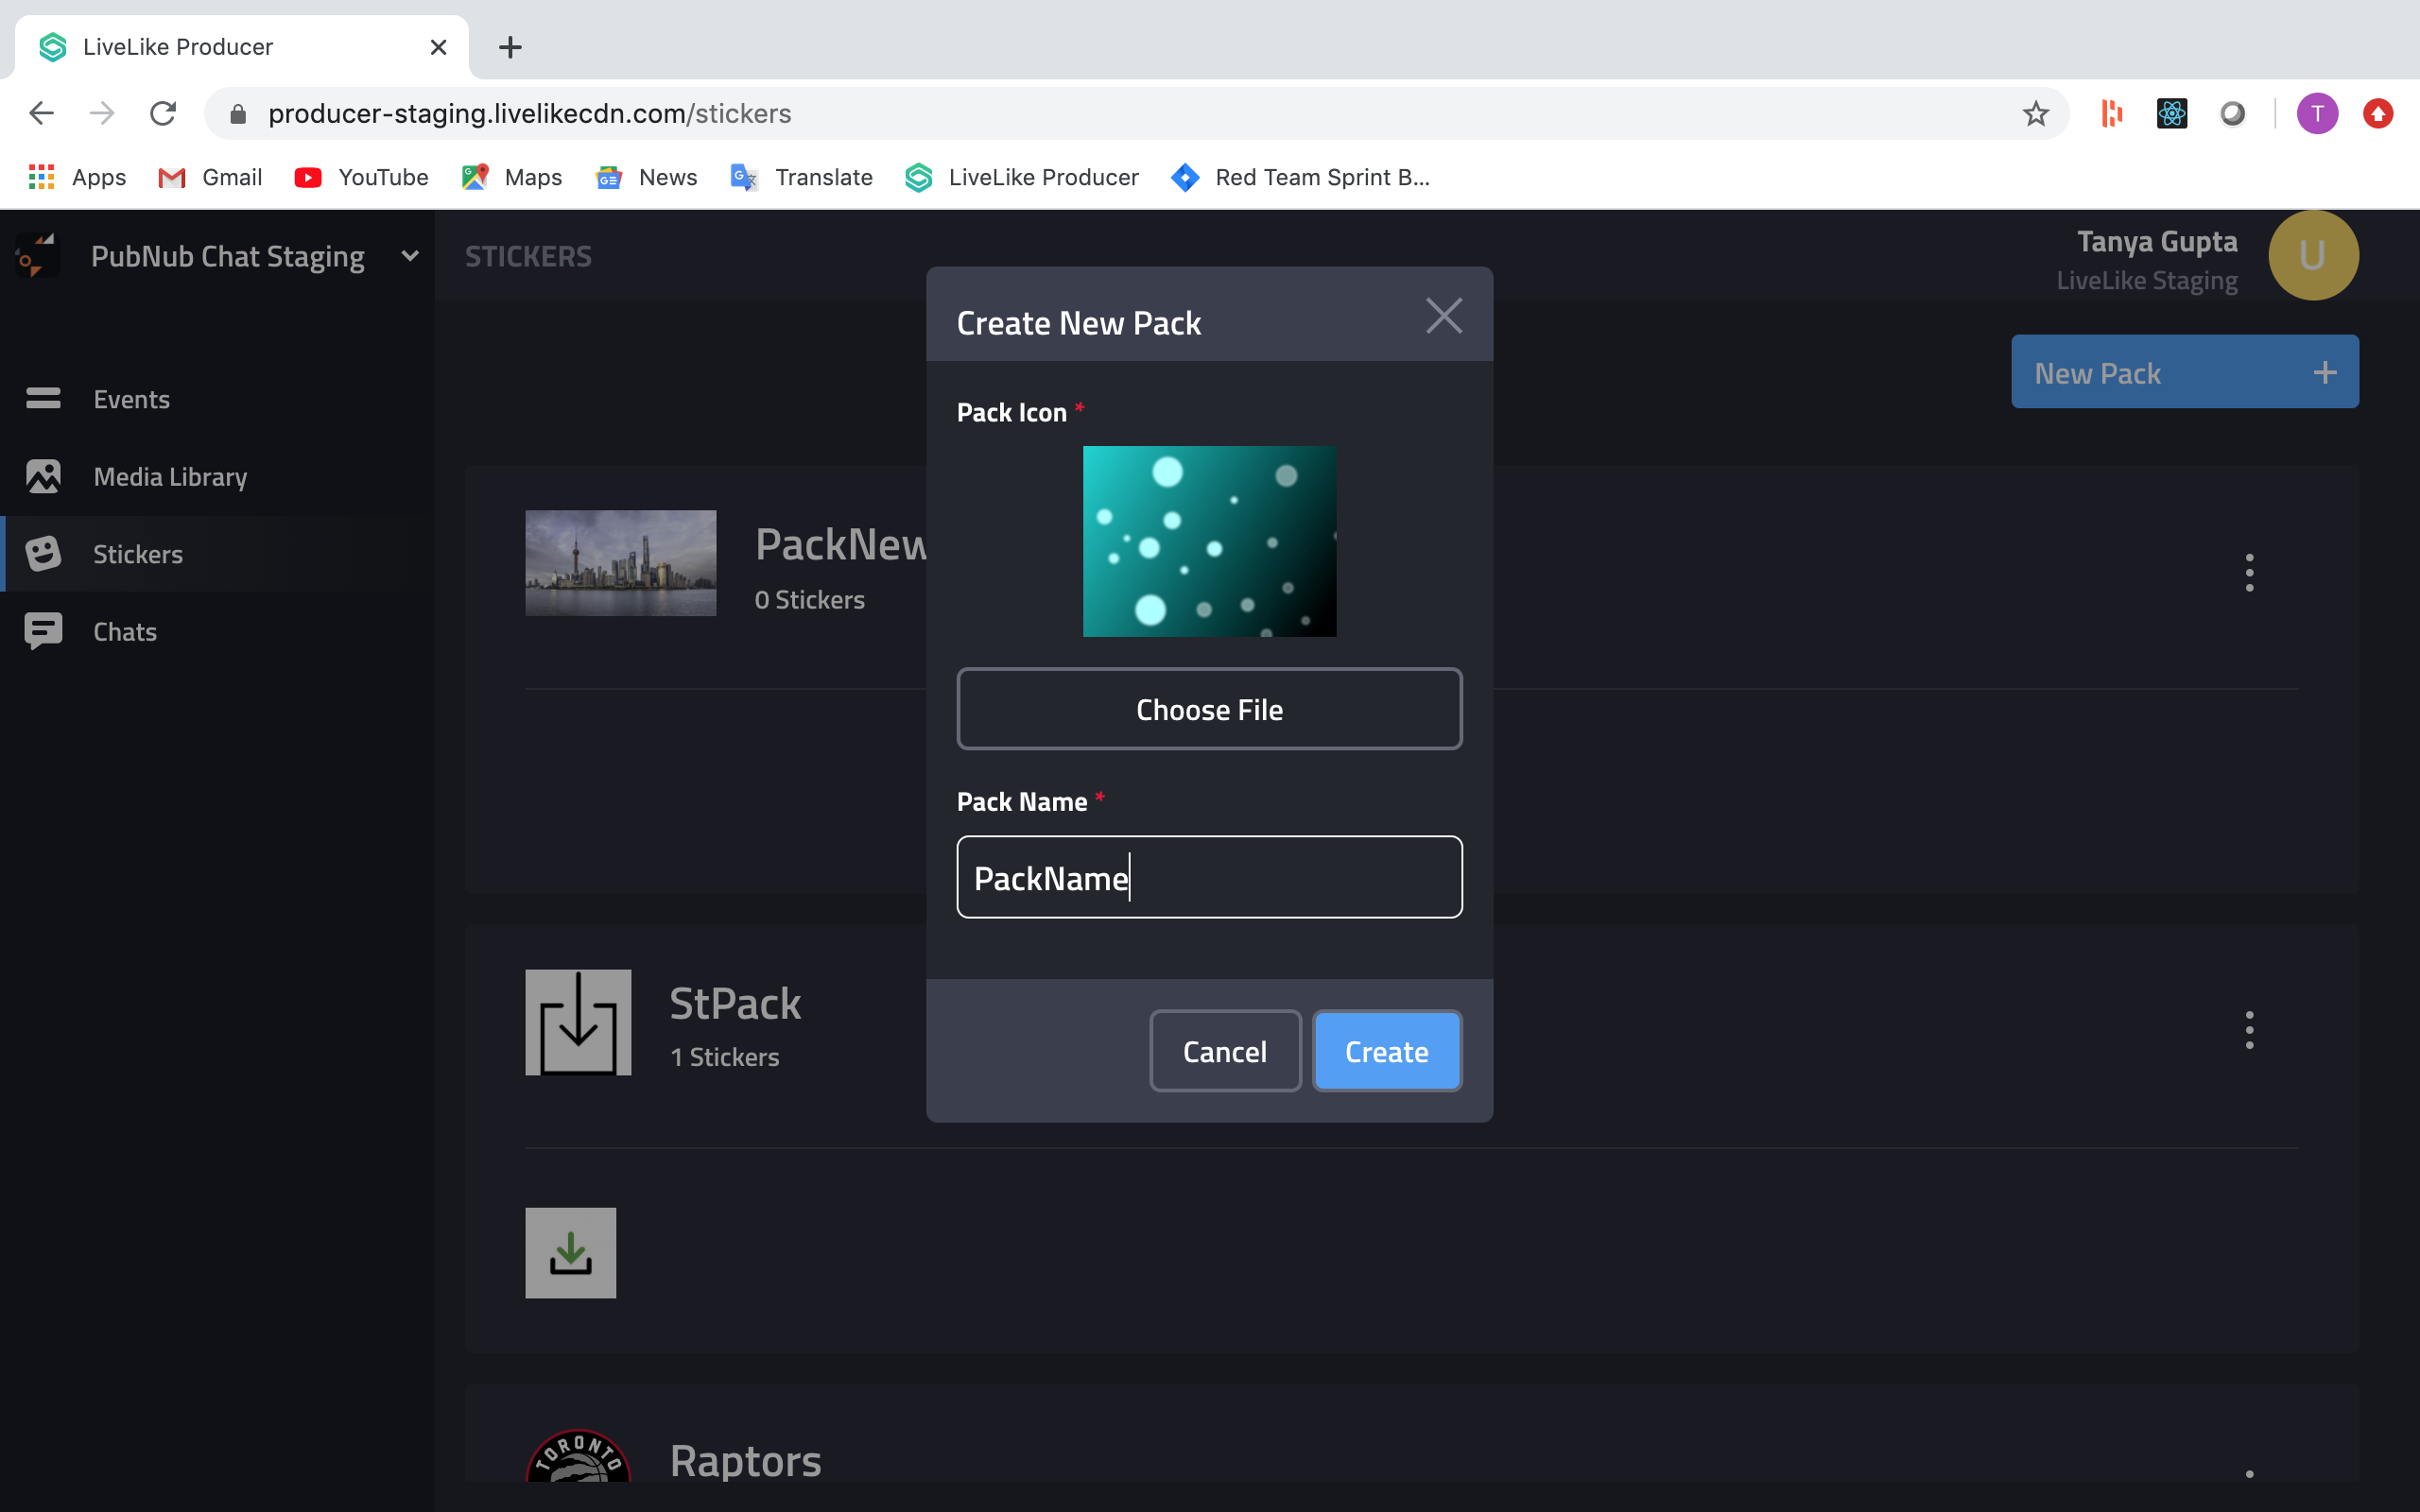
Each Sticker Pack has following fields:
Pack Icon
Pack Name
Badges
A badge can be awarded or earned. To award a badge please use the award badge rest API.
To set up a way to earn a badge, please follow the instructions below to setup badge automation rules.
The following items are required to be completed for a user to be able to earn a badge.
- Create a Reward Item
- In the Producer Suite, on the left hand side click on Rewards.
- There are three tabs, make sure you are on the tab called Items
- On the top right hand side click on the button New Reward Item
- Fill in the name and click Create
- Create a Reward Action
- In the Producer Suite, on the left hand side click on Rewards.
- There are three tabs, make sure you are on the tab called Actions
- On the top right hand side click on the button New Reward Action
- Fill in the details and click Create
- Create a Reward Table
- In the Producer Suite, on the left hand side click on Rewards
- There are three tabs, make sure you are on the tab called Tables
- On the top right hand side click on the button New Reward Table
- Fill in the name, pick a program for it to be linked to and click Create
- Once a table is created, click on it's name in the list of all Reward Tables.
- You will see a screen showing all table entries. To add a new one, click on the New Entry button
- In the New Entry modal, you will be able to pick and connect a Reward Action with a Reward Item in addition you will be able to set up a Reward Item Amount, which is the amount that will be awarded to a user when this entry is earned.
- Click Create to create a reward table entry
- Create a Badge
- In the Producer Suite, on the left hand side click on Badges.
- On the top right hand side, click on the button New Badge
- Fill in all the information and click Create
- Connect the Badge with a Reward Item
- Find the Badge you created in the Badges list
- Click on the three vertical dots on the right hand side and click Edit Badge
- In this modal you will be able to create a connection between a Reward Item and a Badge. In addition you will be able to set the Reward Item Threshold, which is the amount of points a user is required to earn this badge.
Updated 5 months ago
